
Create and edit to-dos
All to-dos in a workspace are organised into to-do lists and can be managed in the "To-Dos" section.
Note: By default, to-dos located in the "To-Dos" section are visible to all workspace users, regardless of their access levels and rights. To restrict access to to-dos, consider creating private to-do lists.
Contents
Creating to-dos
- 1
-
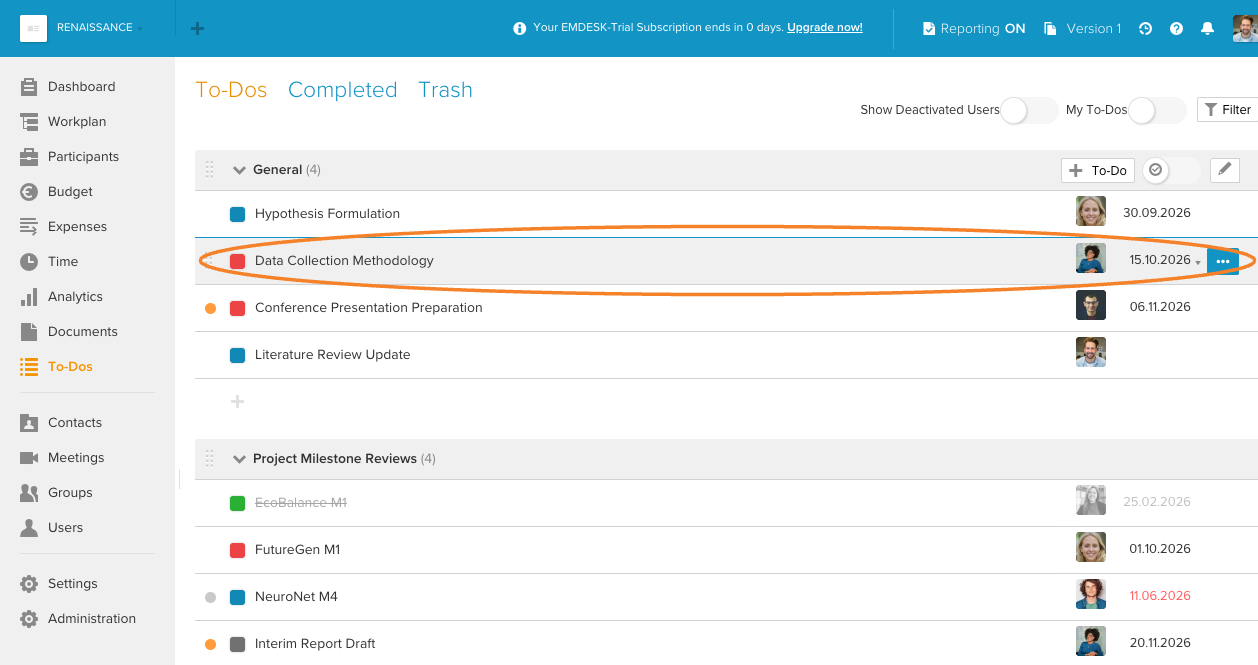
Click To-Dos in Home menu, this will open the "To-Dos" section.
- 2
-
Click + Add To-Do at the bottom of the section, this will open the "New To-Do" sidebar.
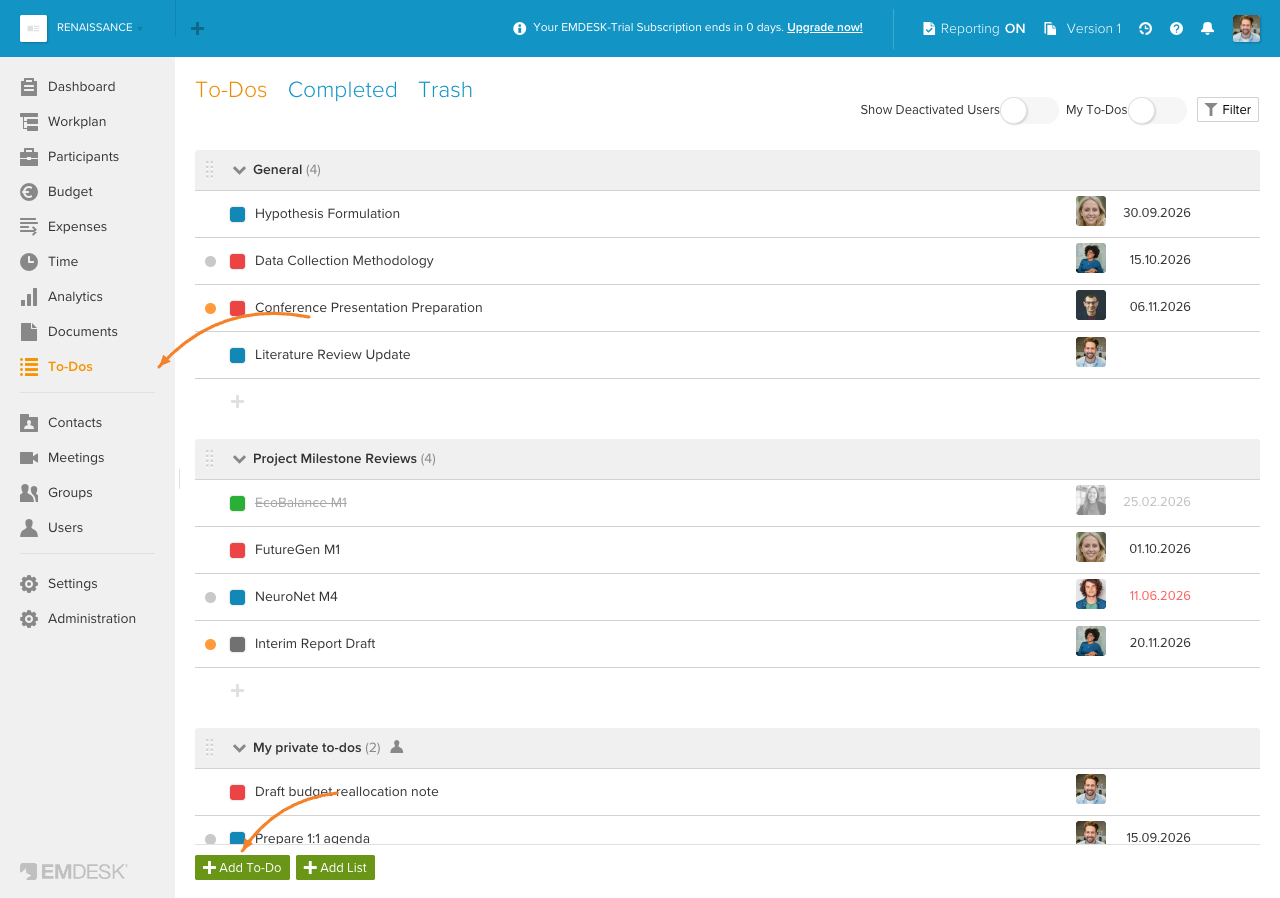
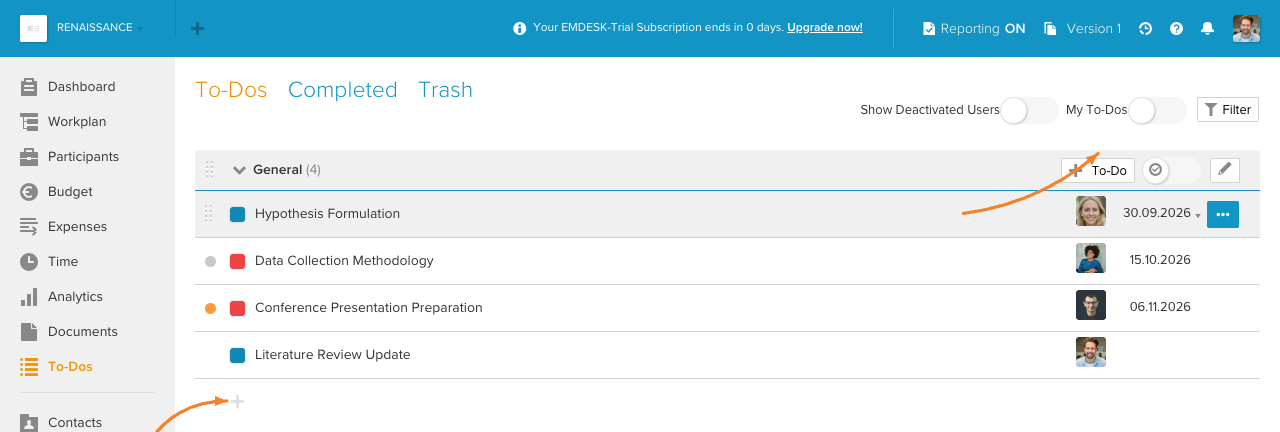
Tip: You can also use the quick + To-Do buttons located inside each of your to-do lists and directly on the to-do lists' bars (then the to-do list of the new to-do is automatically predefined):
- 3
-
In the sidebar, you can set the following properties for the new to-do:
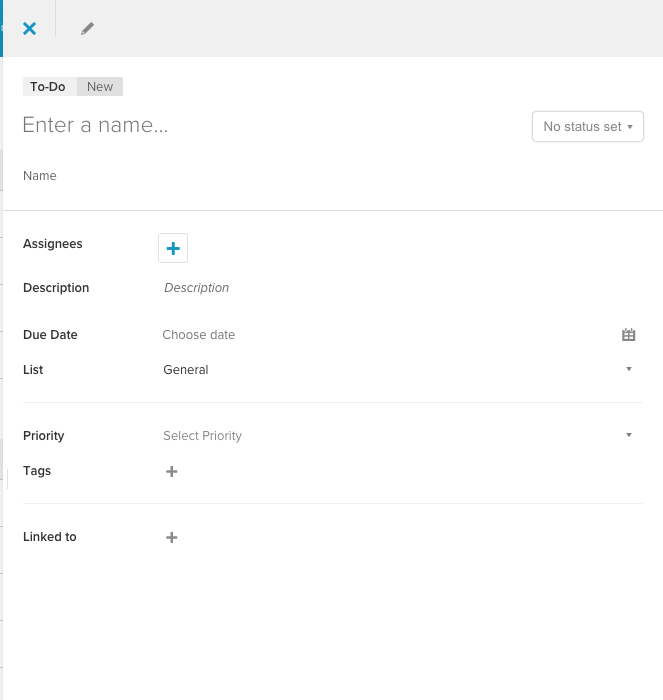
- Name: Click the placeholder at the top and enter a name for the to-do
- Status (optional): Click the dropdown to select a status for the to-do; available statuses are determined by the status workflow set in the to-do list. You can change to another status workflow in the to-do list; see Customise to-do statuses to edit the workflow itself.
- Assignees (optional): Click + to assign individual users or groups to the to-do (Note that when creating to-dos in private lists, only the users and groups with whom you have shared the list are available)
- Description (optional): Click into the field and provide a description for the to-do
- Due date: Choose the due date for the to-do by clicking the "Calendar" icon
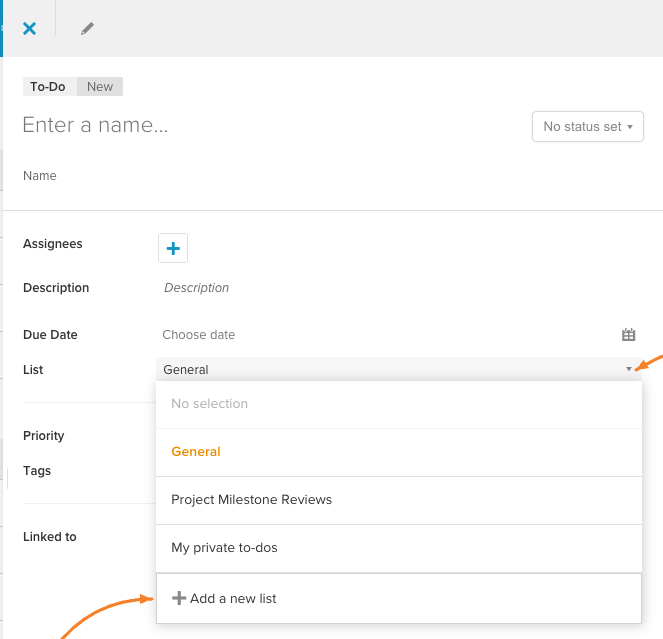
- List: You can move this to-do to another existing or create a new list, click Add a new list to create a new one (read "Create and edit to-do lists"):
- Reminder (optional): Set a to-do reminder from the dropdown (the due date must already be set)
- Priority (optional): Set the priority for the to-do
- Tags (optional): Categorise the to-do by adding tags
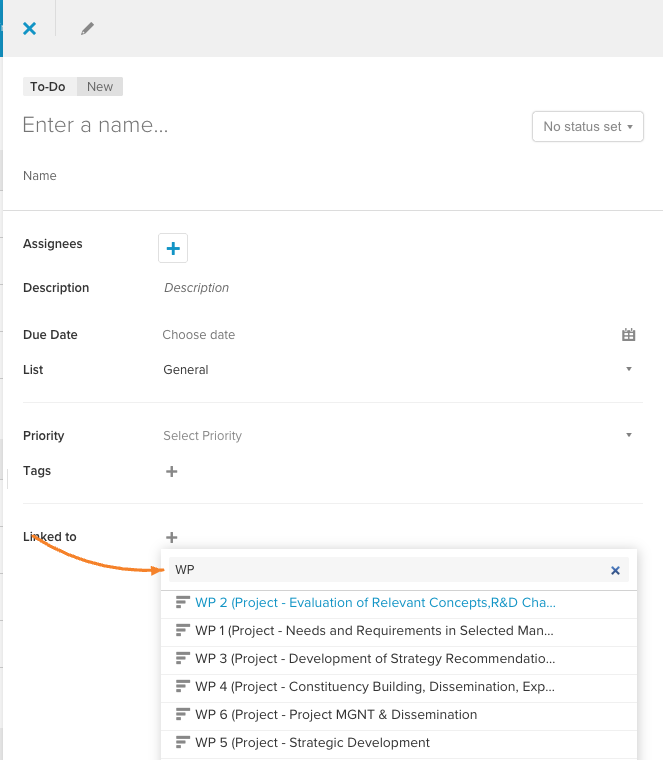
- Linked to (optional): Link the new to-do to any item located in the "Workplan", "Budget", "Expenses", "Participants", and "Documents" sections
Note: The reminder will be sent to your email inbox; to receive to-do reminders to your email, make sure that your email notifications are turned on (see Email notifications settings). Tip: - Use the search field to quickly find the necessary item:
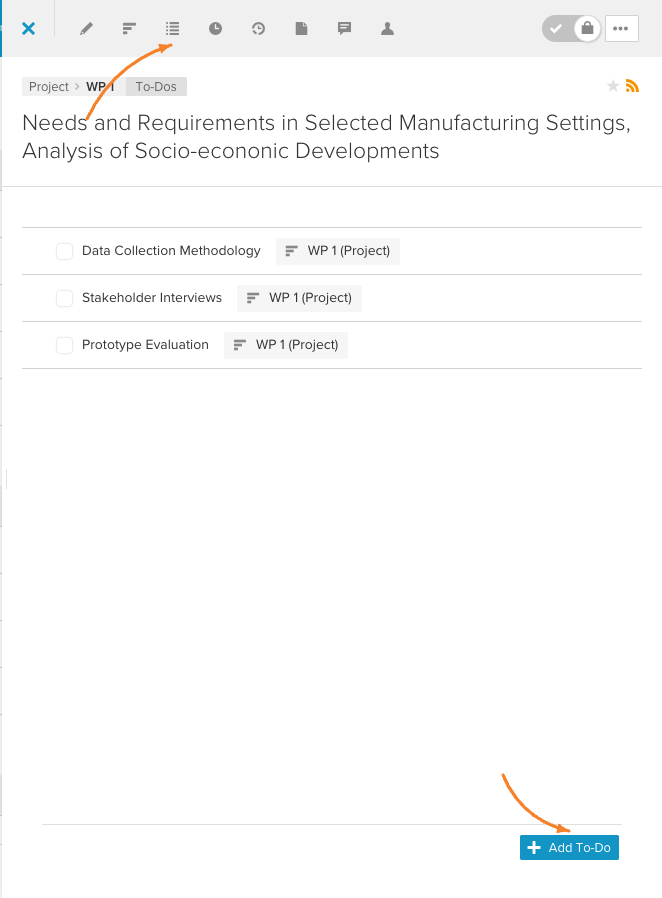
- You can also add a new to-do directly in the item's sidebar, go to the "To-Dos" tab and click Add To-Do at the bottom of the sidebar (then the linked item of this new to-do is automatically predefined):
- 4
-
Click Save To-Do at the bottom of the sidebar, the to-do is created at the respective to-do list.
Editing to-dos
- 1
-
Click To-Dos in Home menu, this will open the "To-Dos" section.
- 2
-
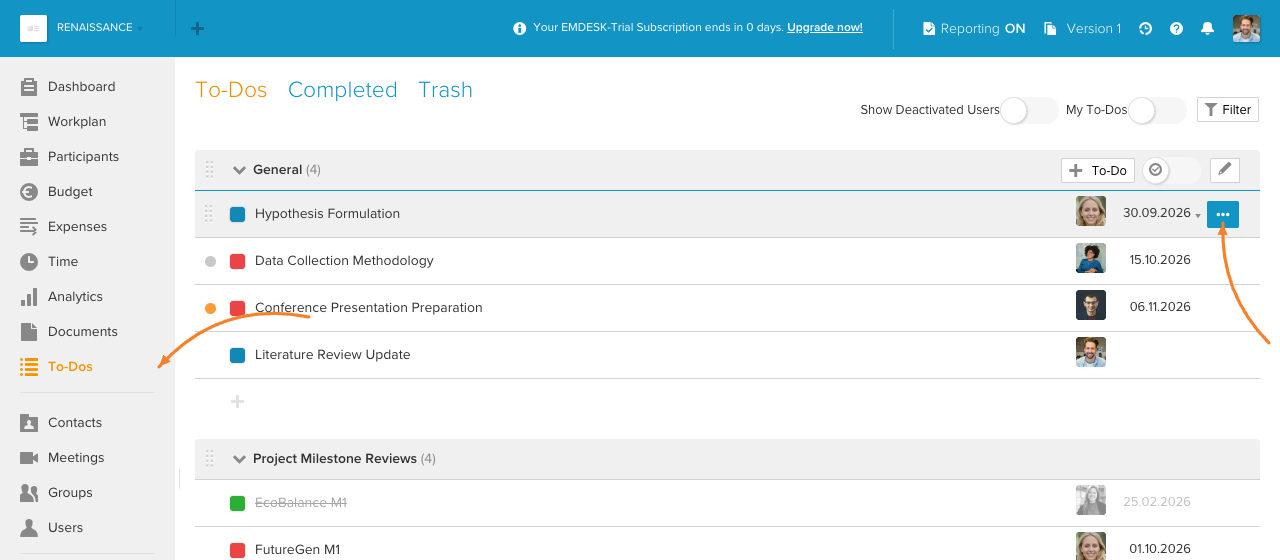
Click on the to-do that you would like to edit or click on its "Edit" icon, this will open a sidebar for the to-do.
- 3
-
In the sidebar, you can update the following properties for the to-do:
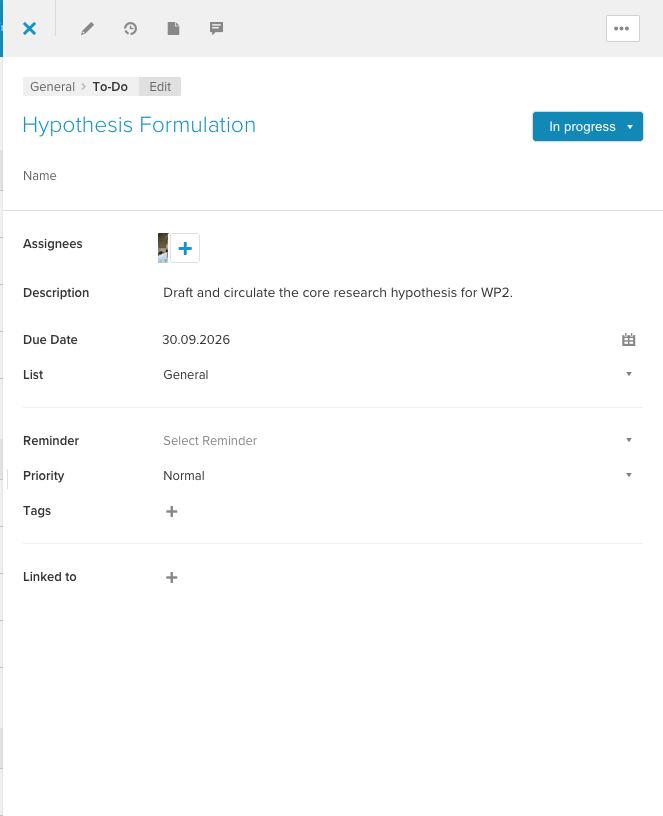
- Name: Click the placeholder at the top and update the to-do name
- Status (optional): Click the dropdown to select a new status for the to-do; available statuses are determined by the status workflow set in the to-do list. You can change to another status workflow in the to-do list; see Customise to-do statuses to edit the workflow itself.
- Assignees (optional): Click + to change the individual users or groups assigned to the to-do (Note that when creating to-dos in private lists, only the users and groups with whom you have shared the list are available)
- Description (optional): Click into the field and edit the to-do description
- Due date: Update the due date for the to-do by clicking the "Calendar" icon
- List: You can move this to-do to another existing or create a new list, click Add a new list to create a new one (read "Create and edit to-do lists"):
- Reminder (optional): Select the new to-do reminder from the dropdown (the due date must already be set)
- Priority (optional): Change the priority of the to-do using the dropdown
- Tags (optional): Categorise the to-do by adding tags
- Linked to (optional): Link the to-do to any item located in the "Workplan", "Budget", "Expenses", "Participants", and "Documents" sections
Note: The reminder will be sent to your email inbox; to receive to-do reminders, make sure that your email notifications are turned on (see Email notifications settings). Tip: Use the search field to quickly find the necessary item:
- 4
-
Click Save To-Do at the bottom of the sidebar.
Note: Read here how to delete to-dos.