
Create and edit folders
Organise your documents by creating folders and subfolders in the Documents section. Each folder can get its own icon and colour, so that important folders stand out.
💡 Note: To create or move a folder, you need Manage rights to the Documents section (or the parent folder); to edit an existing folder's details, Edit rights to that folder are enough (see Roles and access rights).
Create a new folder
- Open Documents and go to the folder in which the new folder should be created.
- Click + Folder at the bottom of the section. A sidebar opens with a suggested name already filled in.

- Replace the suggested Name, add Tags if you want to filter by them later, and choose an icon and a Color (see below).
- Click Save Folder.
Tip: To open a folder, double-click it, or hover over it and click the open icon.
Edit a folder: name, icon and colour
- Hover over the folder and choose Properties from the action menu. The folder's sidebar opens.
- Change the Name or Tags as needed.
- Click the folder icon at the top left of the sidebar and pick another icon, e.g. for presentations, contracts or deliverables. Below, choose one of the 12 colours under Color.

- Click Save Folder.
Use the star icon at the top of the sidebar to mark the folder as a favourite, and the follow icon next to it to get notified about changes. The sidebar also shows the folder's total size and a Direct Link you can copy to share the folder with other EMDESK users.
Move a folder
You can move a folder, including everything in it, in two ways:
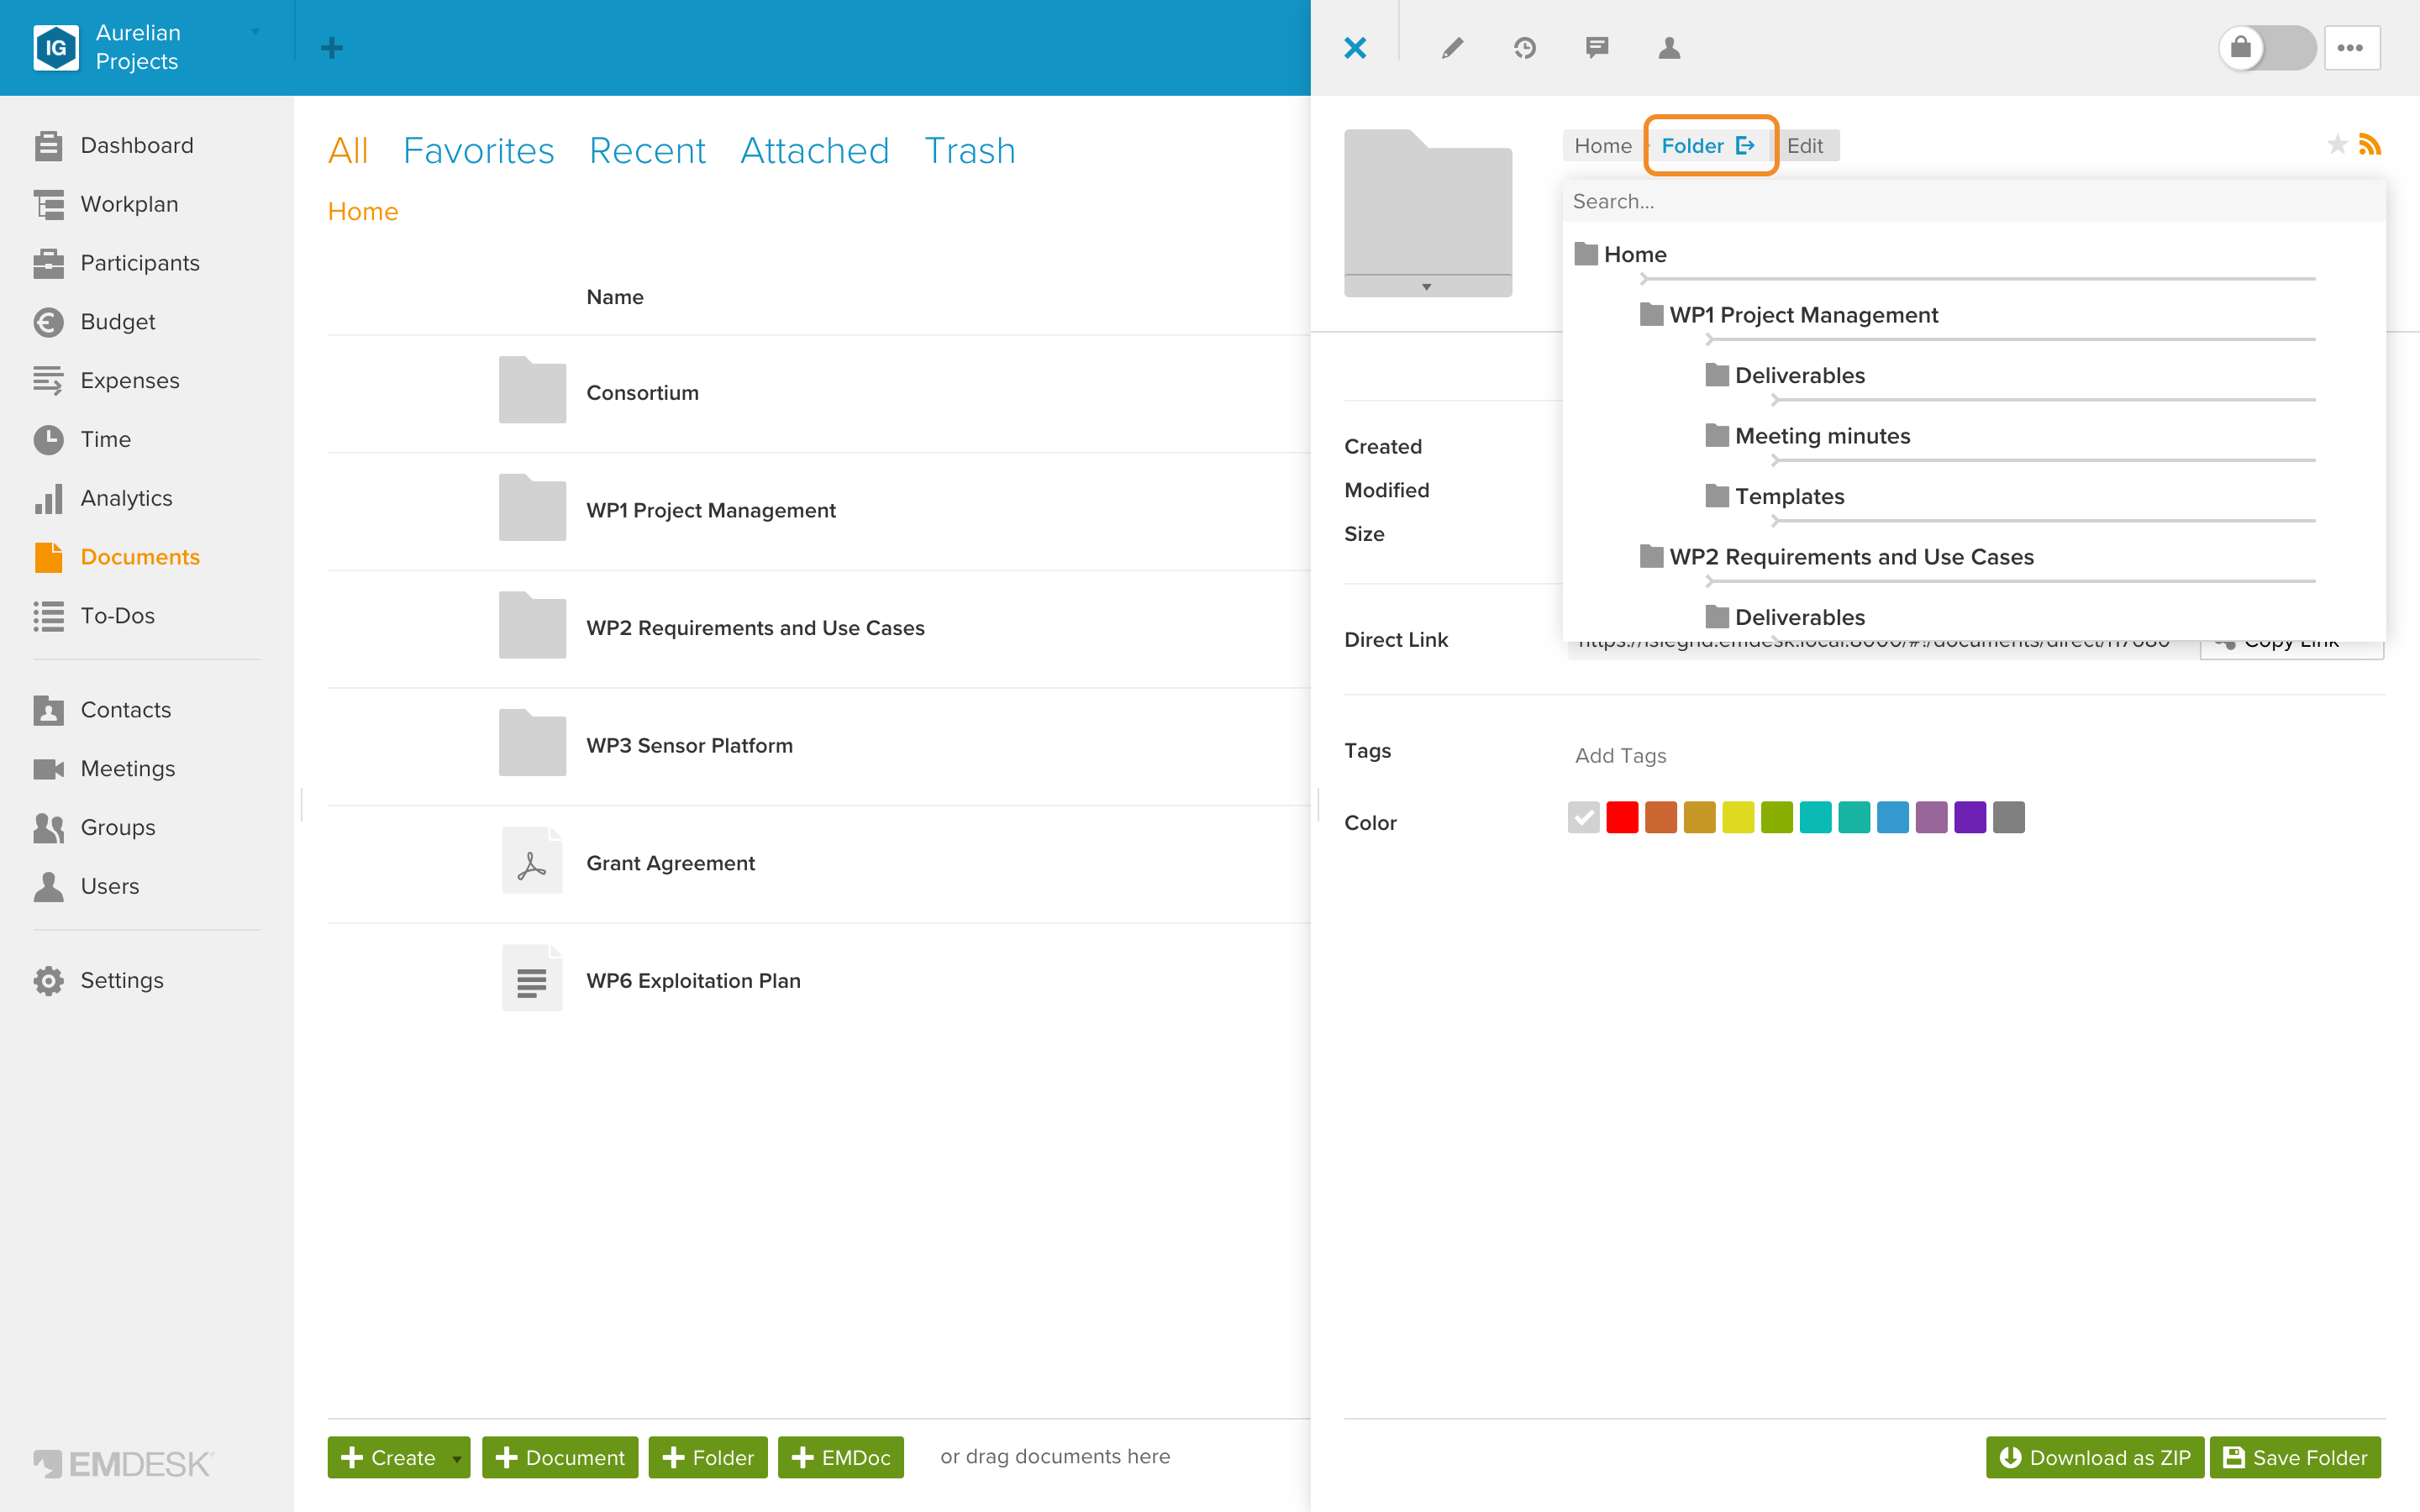
- In the sidebar: open the folder's sidebar, click its location at the top (the folder name next to the path), pick the new parent folder in the folder tree and click Save Folder.
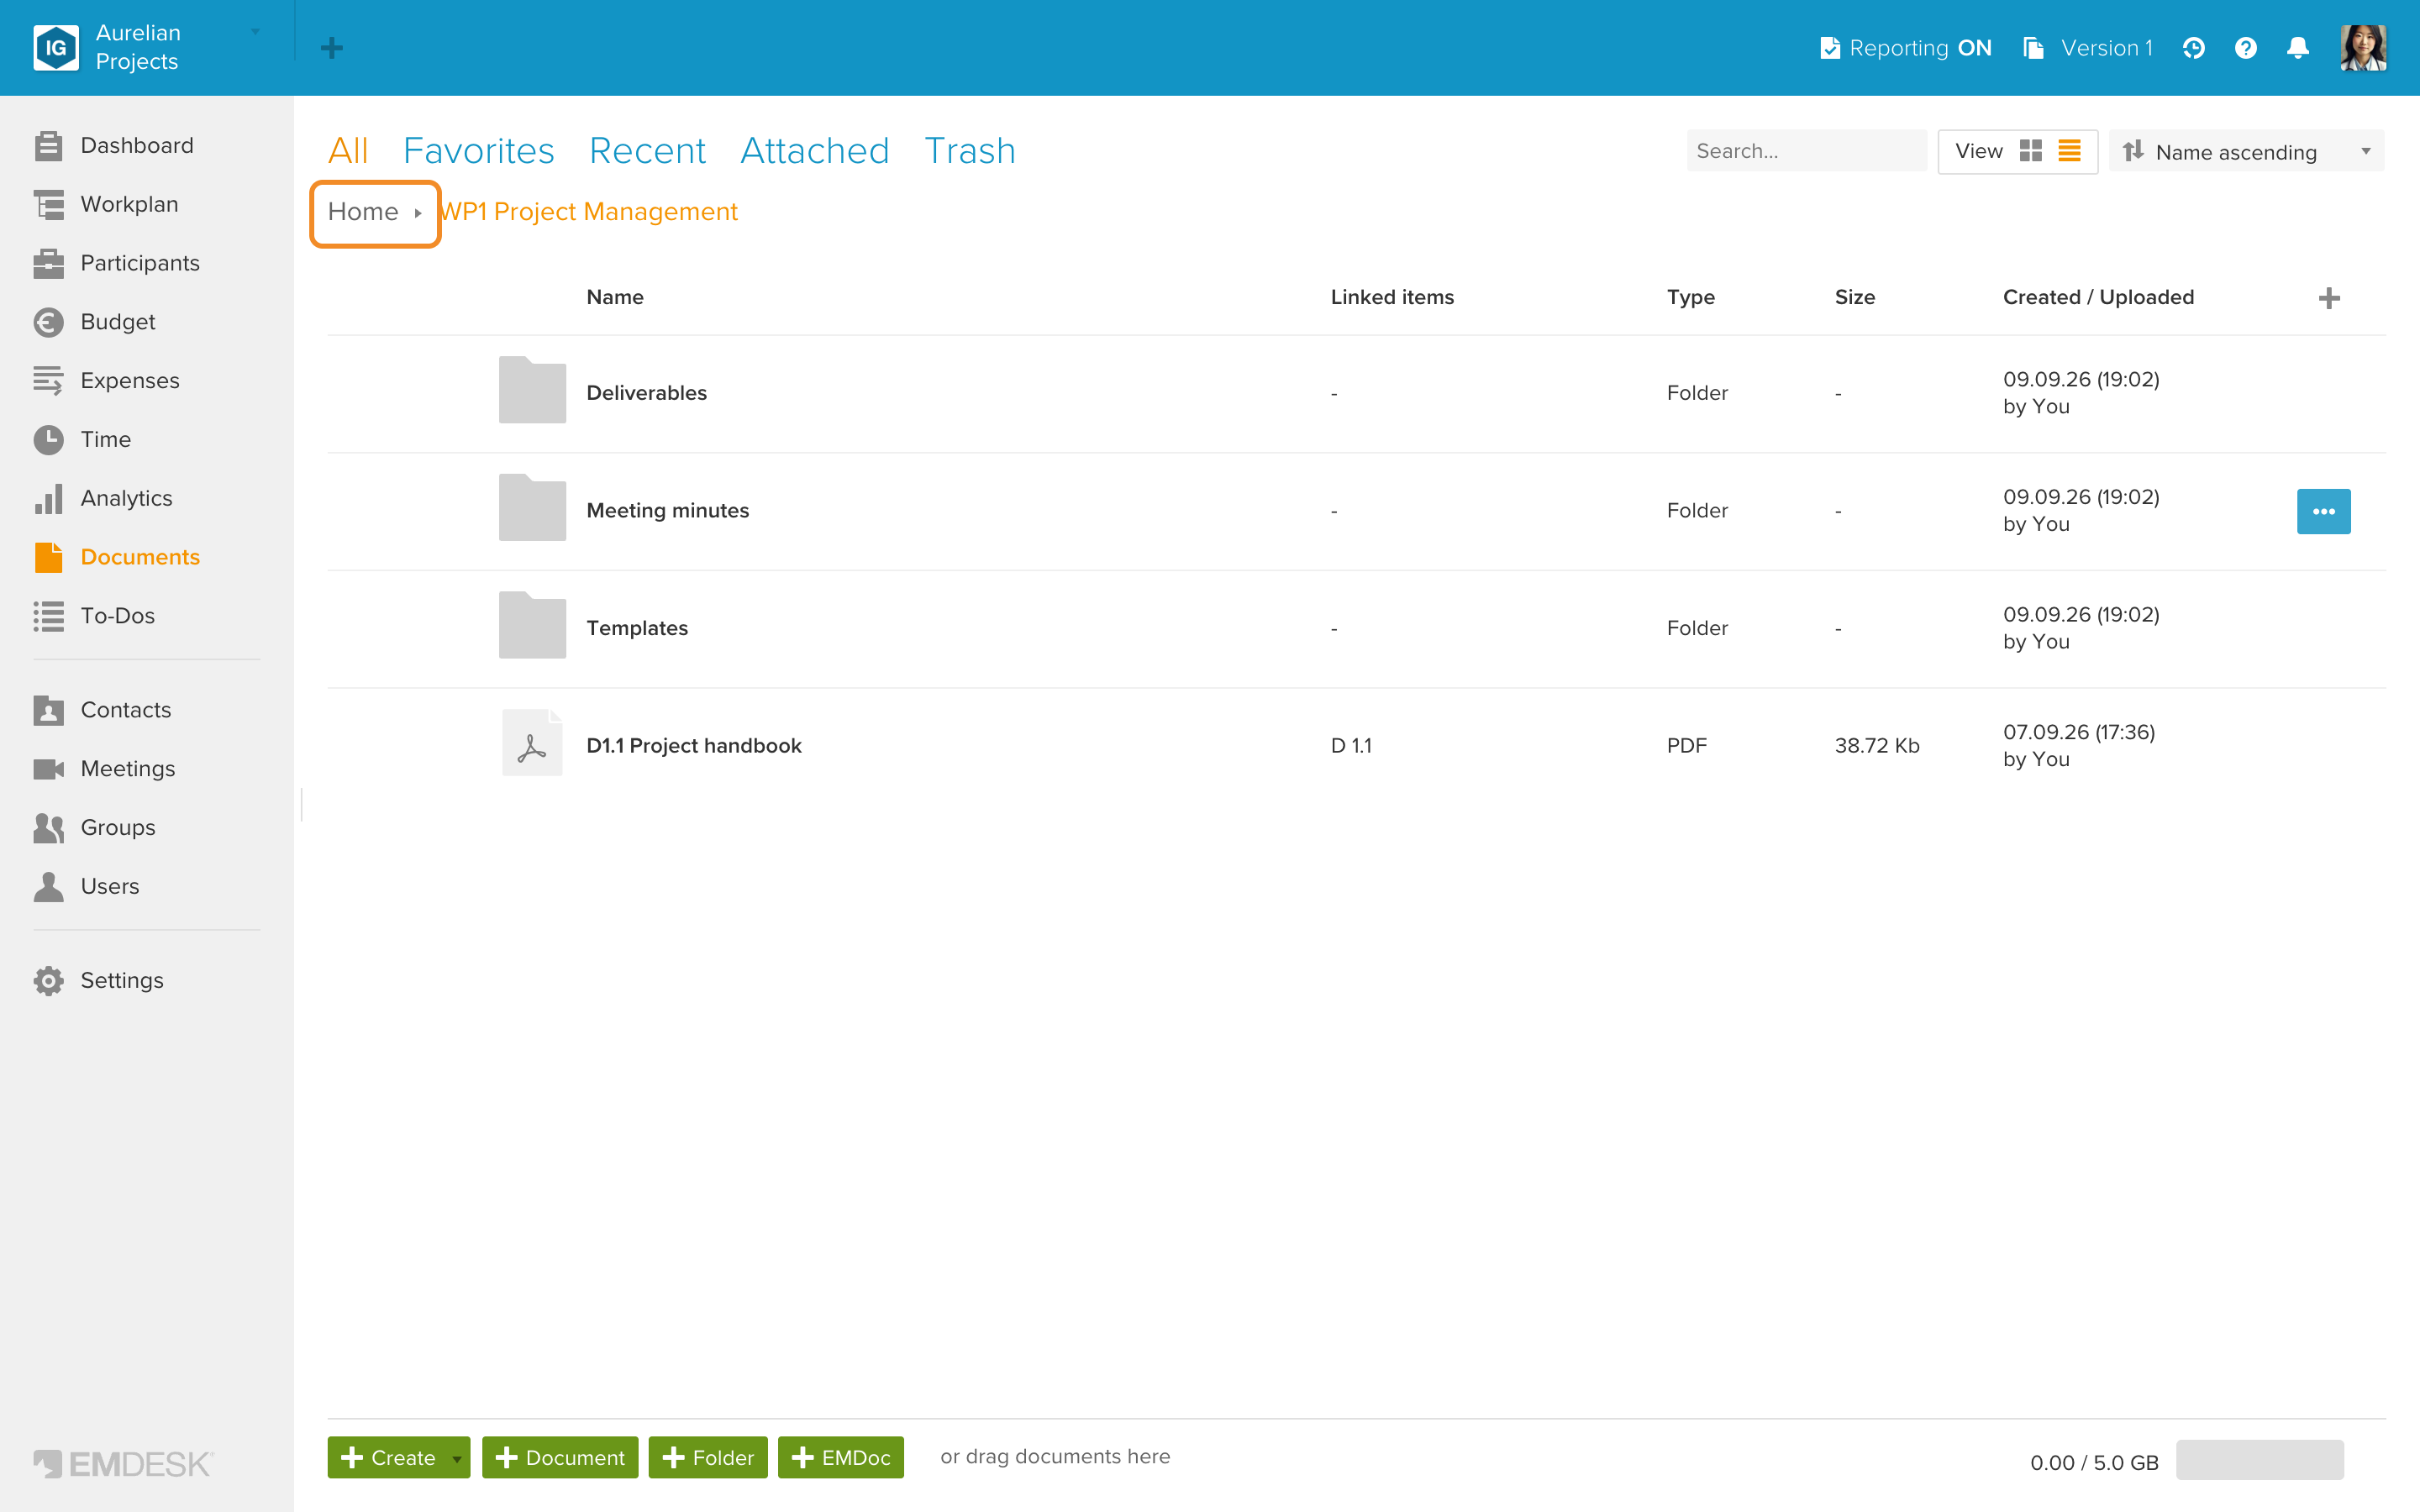
- By drag and drop: drag the folder in the list and drop it onto another folder. To move it to a higher level, drop it onto a folder name in the path (breadcrumb) above the list.
See also Upload documents and Move documents, EMDocs, or folders.