
How to use the Workplan
The Workplan is where you plan and follow up everything your team delivers. It contains your projects. Each project is broken down into activities (for example work packages, tasks and sub-tasks) and events (deliverables or milestones). Budgets, expenses, time tracking and reporting all refer to this structure, so the Workplan is usually the first thing you set up.
Example structure
- ISLEGRID (project)
- WP 1 Project Management (work package = activity)
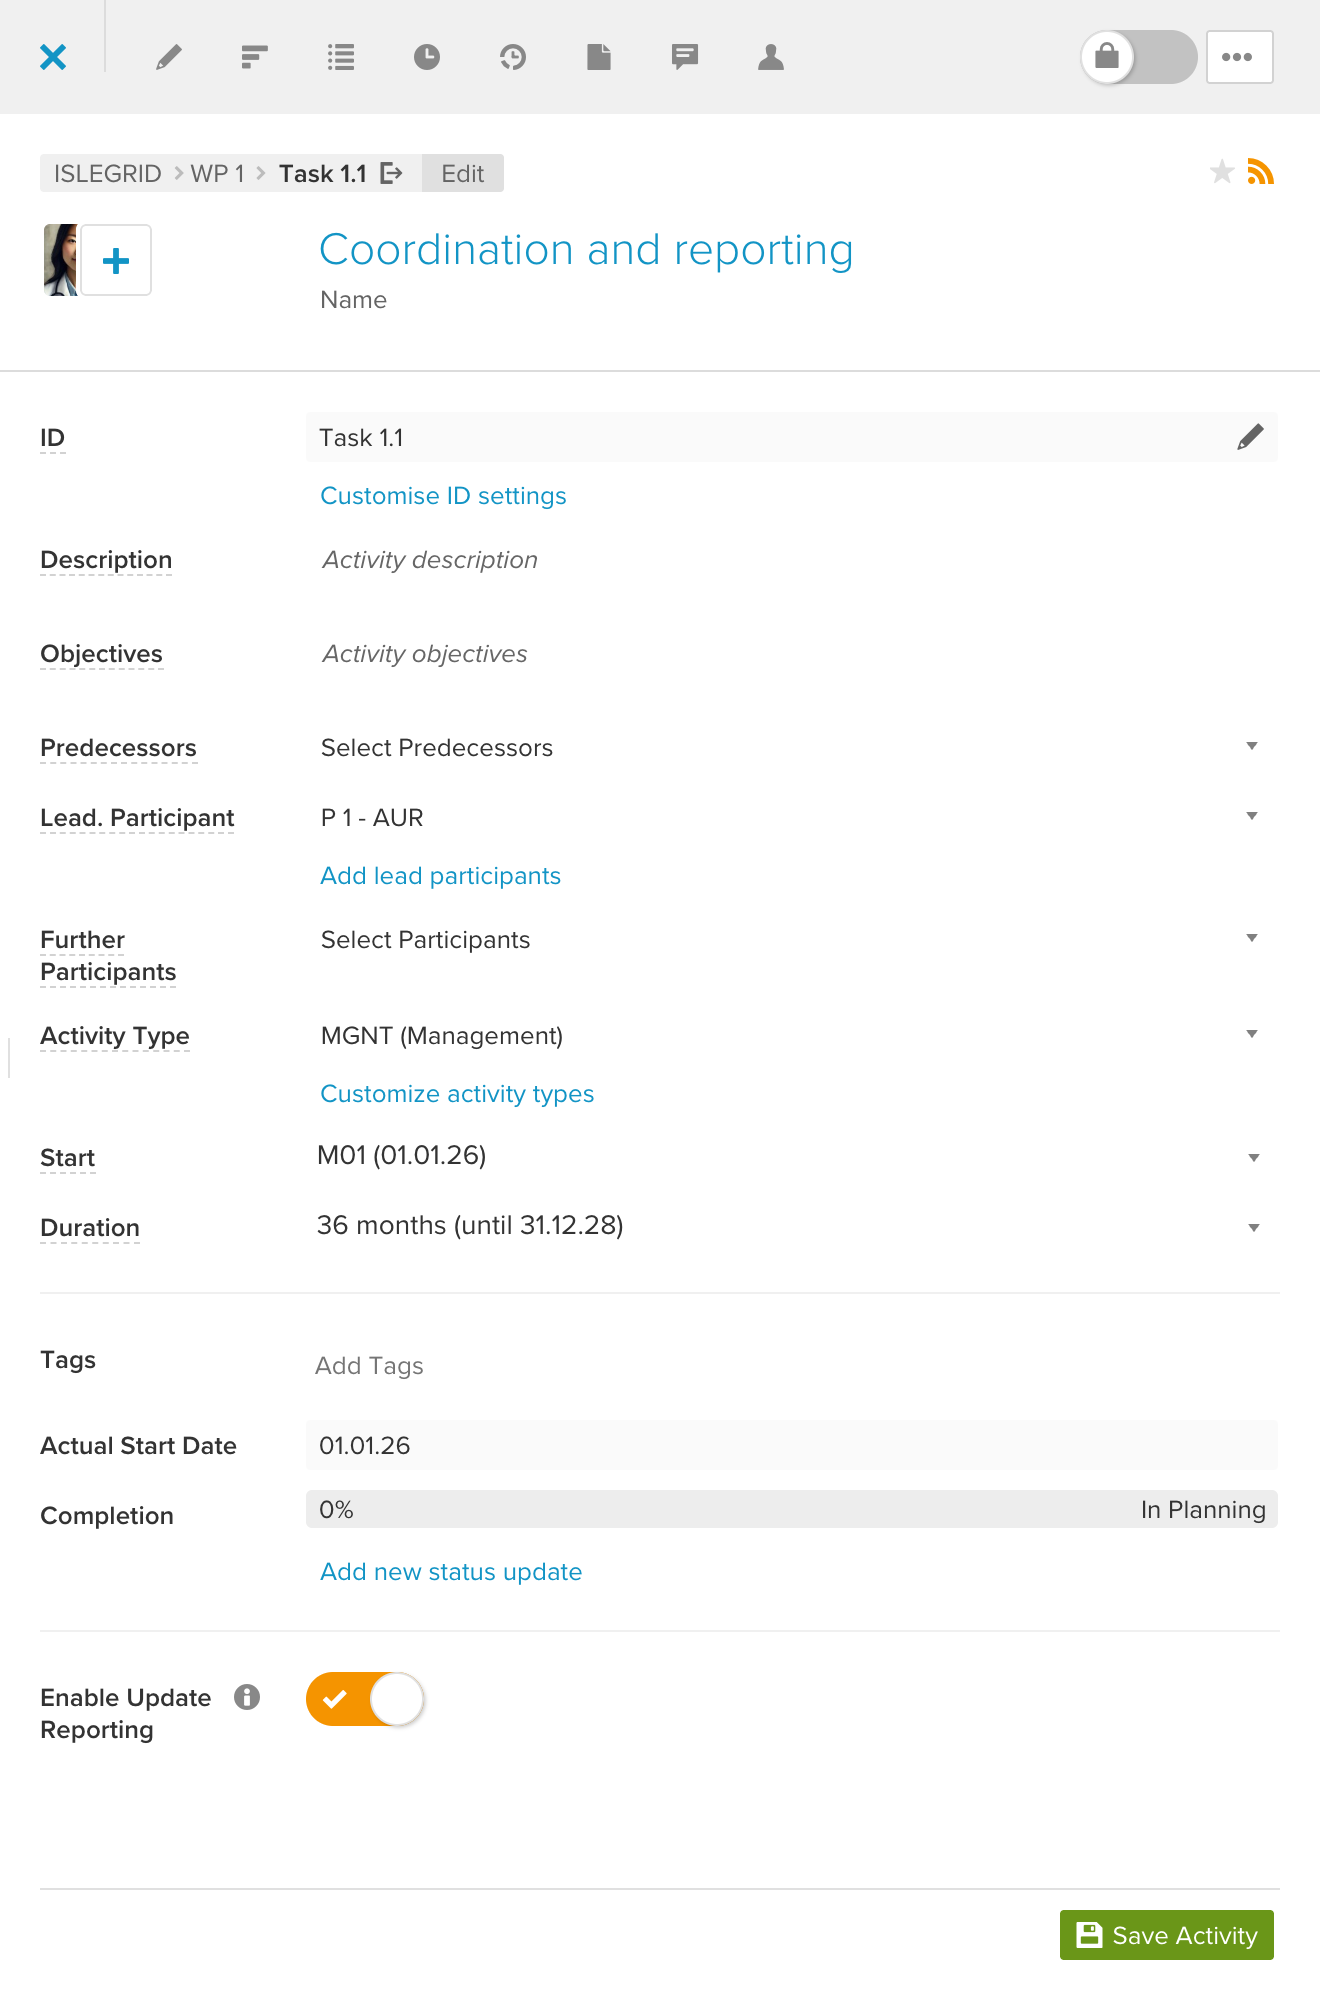
- Task 1.1 Coordination and reporting (task = sub-activity)
- D 1.1 Project handbook (deliverable = event)
- WP 1 Project Management (work package = activity)
The names of the levels (work package, task, …) and the ID format (WP 1, Task 1.1, D 1.1) can be customised.
💡 Note: What you can see and change in the Workplan depends on your access rights. They can be set for the whole Workplan or for individual projects and activities.
Three ways to look at your plan
Switch between the views with Table, Kanban and Gantt at the top left of the Workplan. All three show the same items, so a change in one view appears in the others.
| View | Shows | Best for |
|---|---|---|
| Table | All items as a collapsible list with their properties in columns | Setting up and maintaining the plan, checking dates, budgets and numbers |
| Kanban | Items as cards in one column per status | Following up progress and updating statuses in team meetings |
| Gantt | Items as bars on a timeline, with dependencies | Timing, overlaps, delays, and presenting the schedule |
Table view
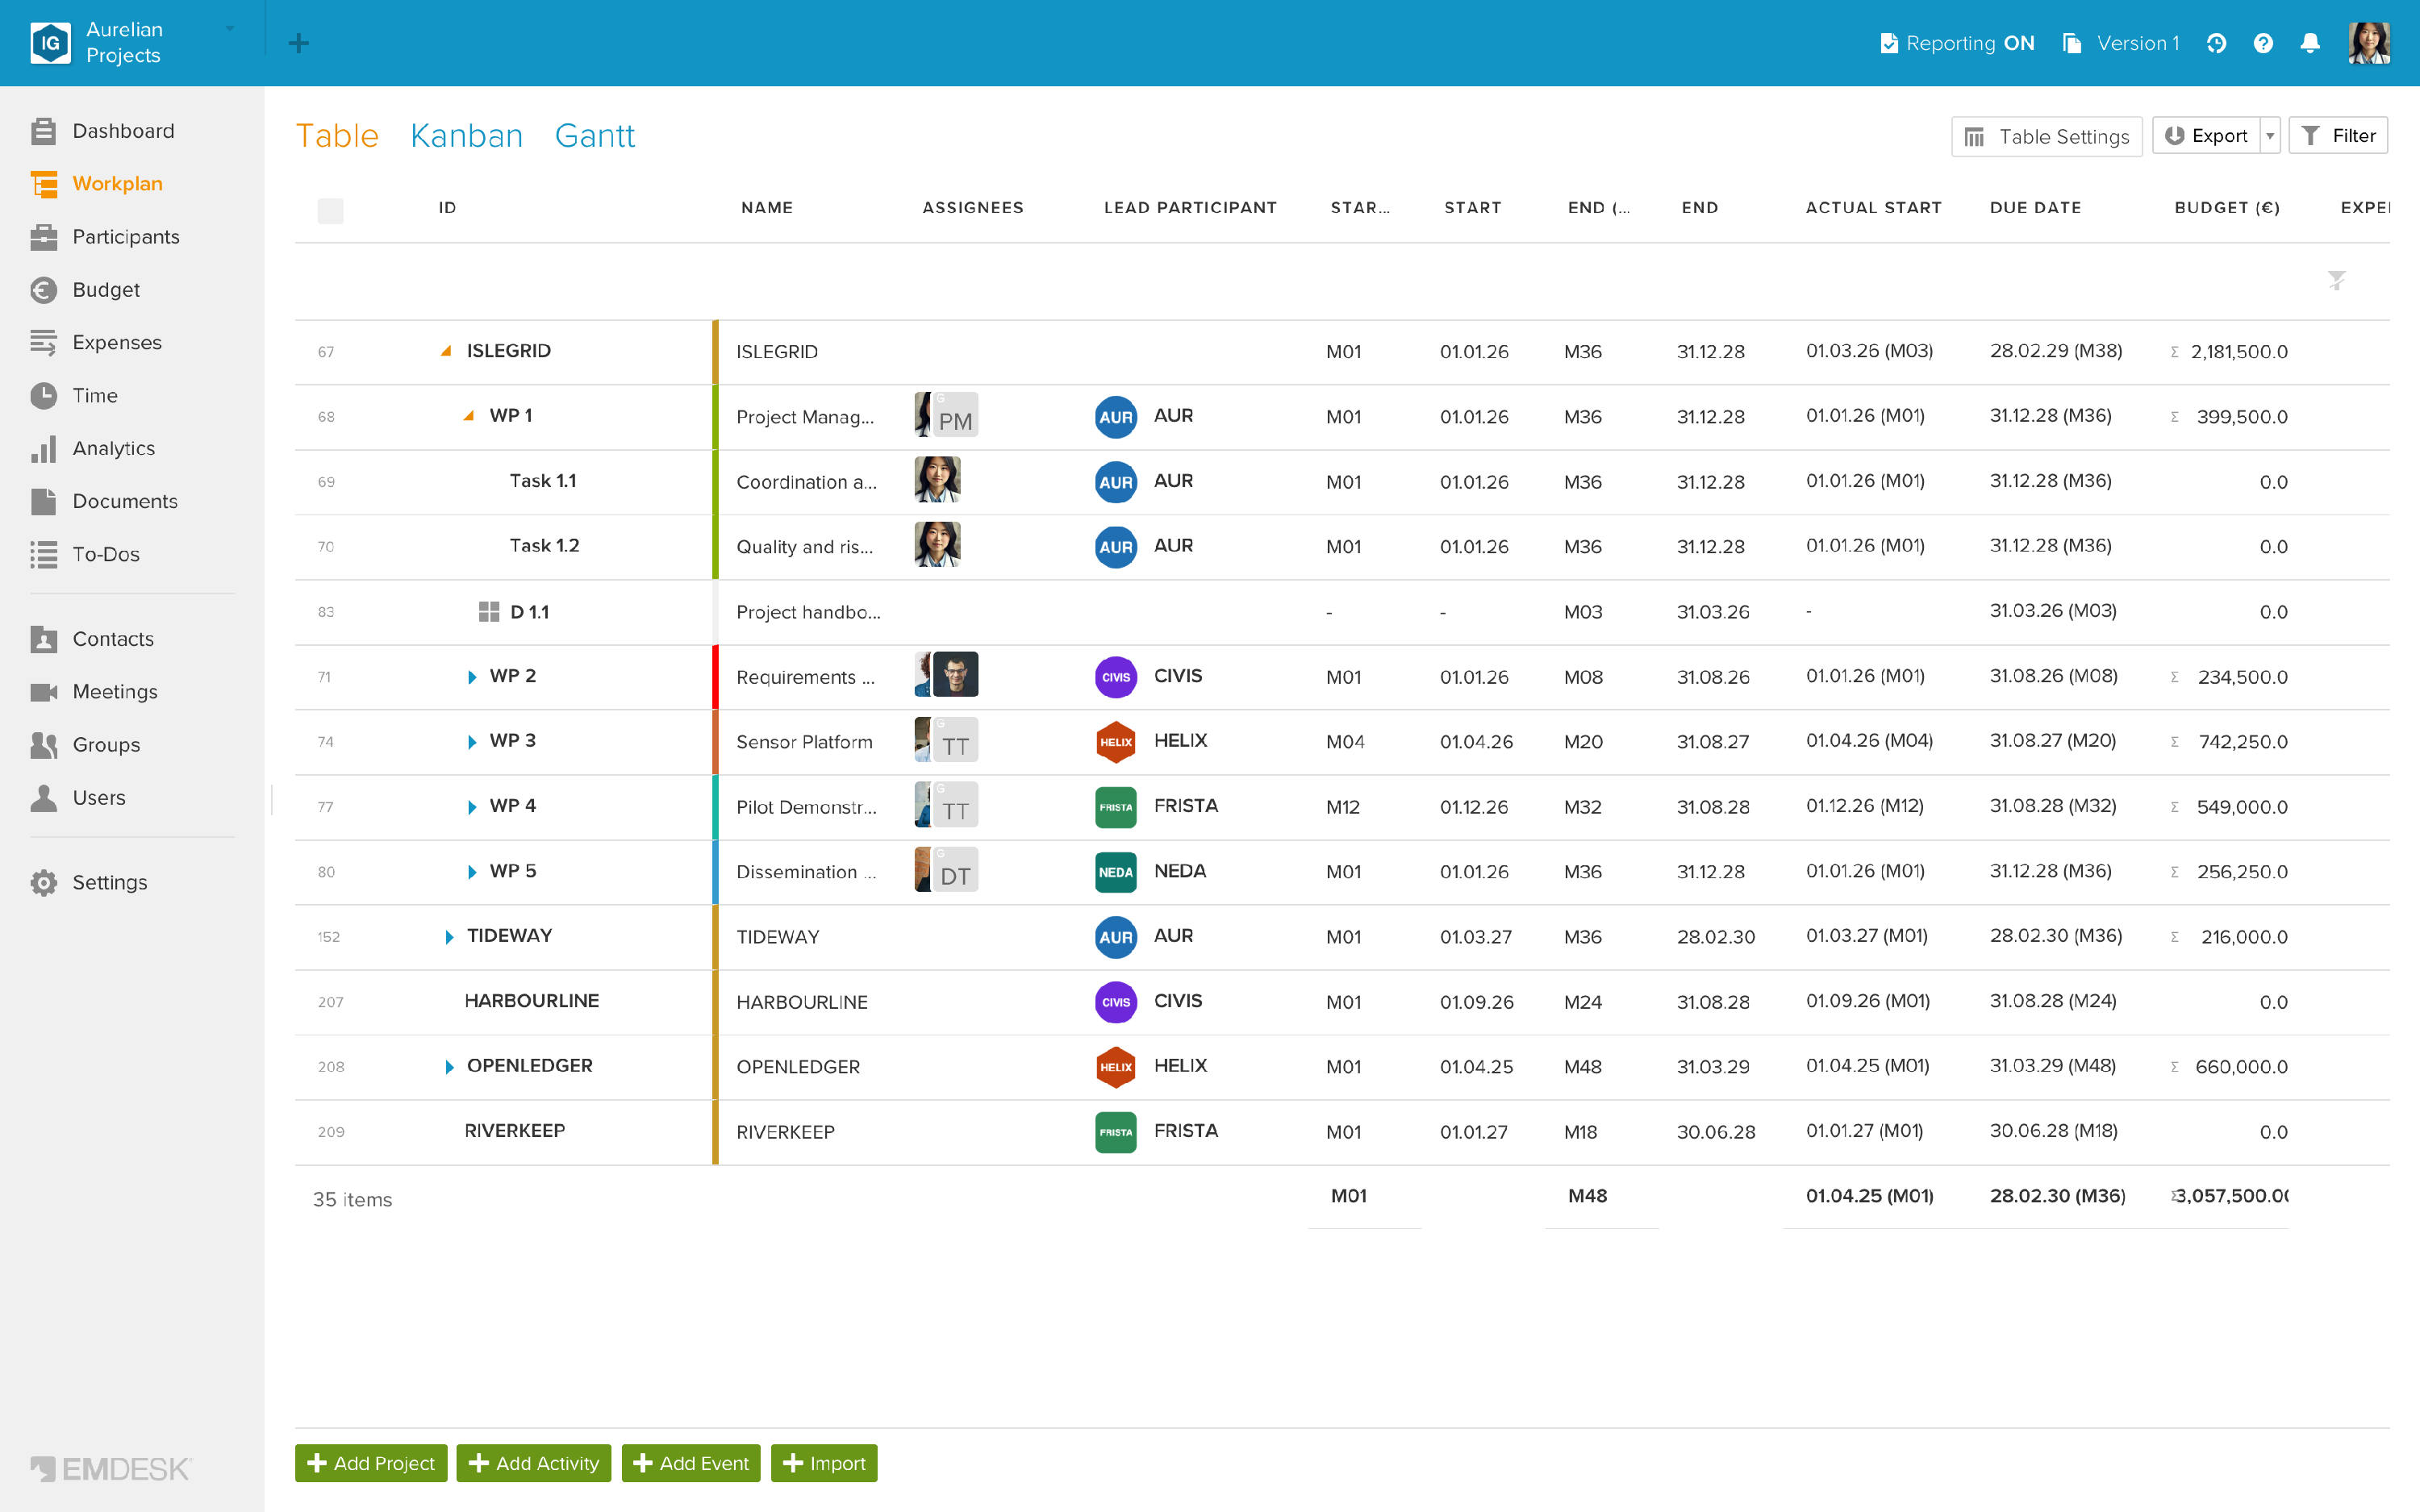
- Click the arrow next to a project or activity to expand or collapse it.
- The columns show planned dates (start/end month and date), actual start, due dates, budget and expenses, lead participant and assignees. The row at the bottom shows the number of items and the totals.
- Use Table Settings to show, hide and order columns, Filter to narrow down the list, and Export to download it.
Read more in Working with the Table view.
Kanban view
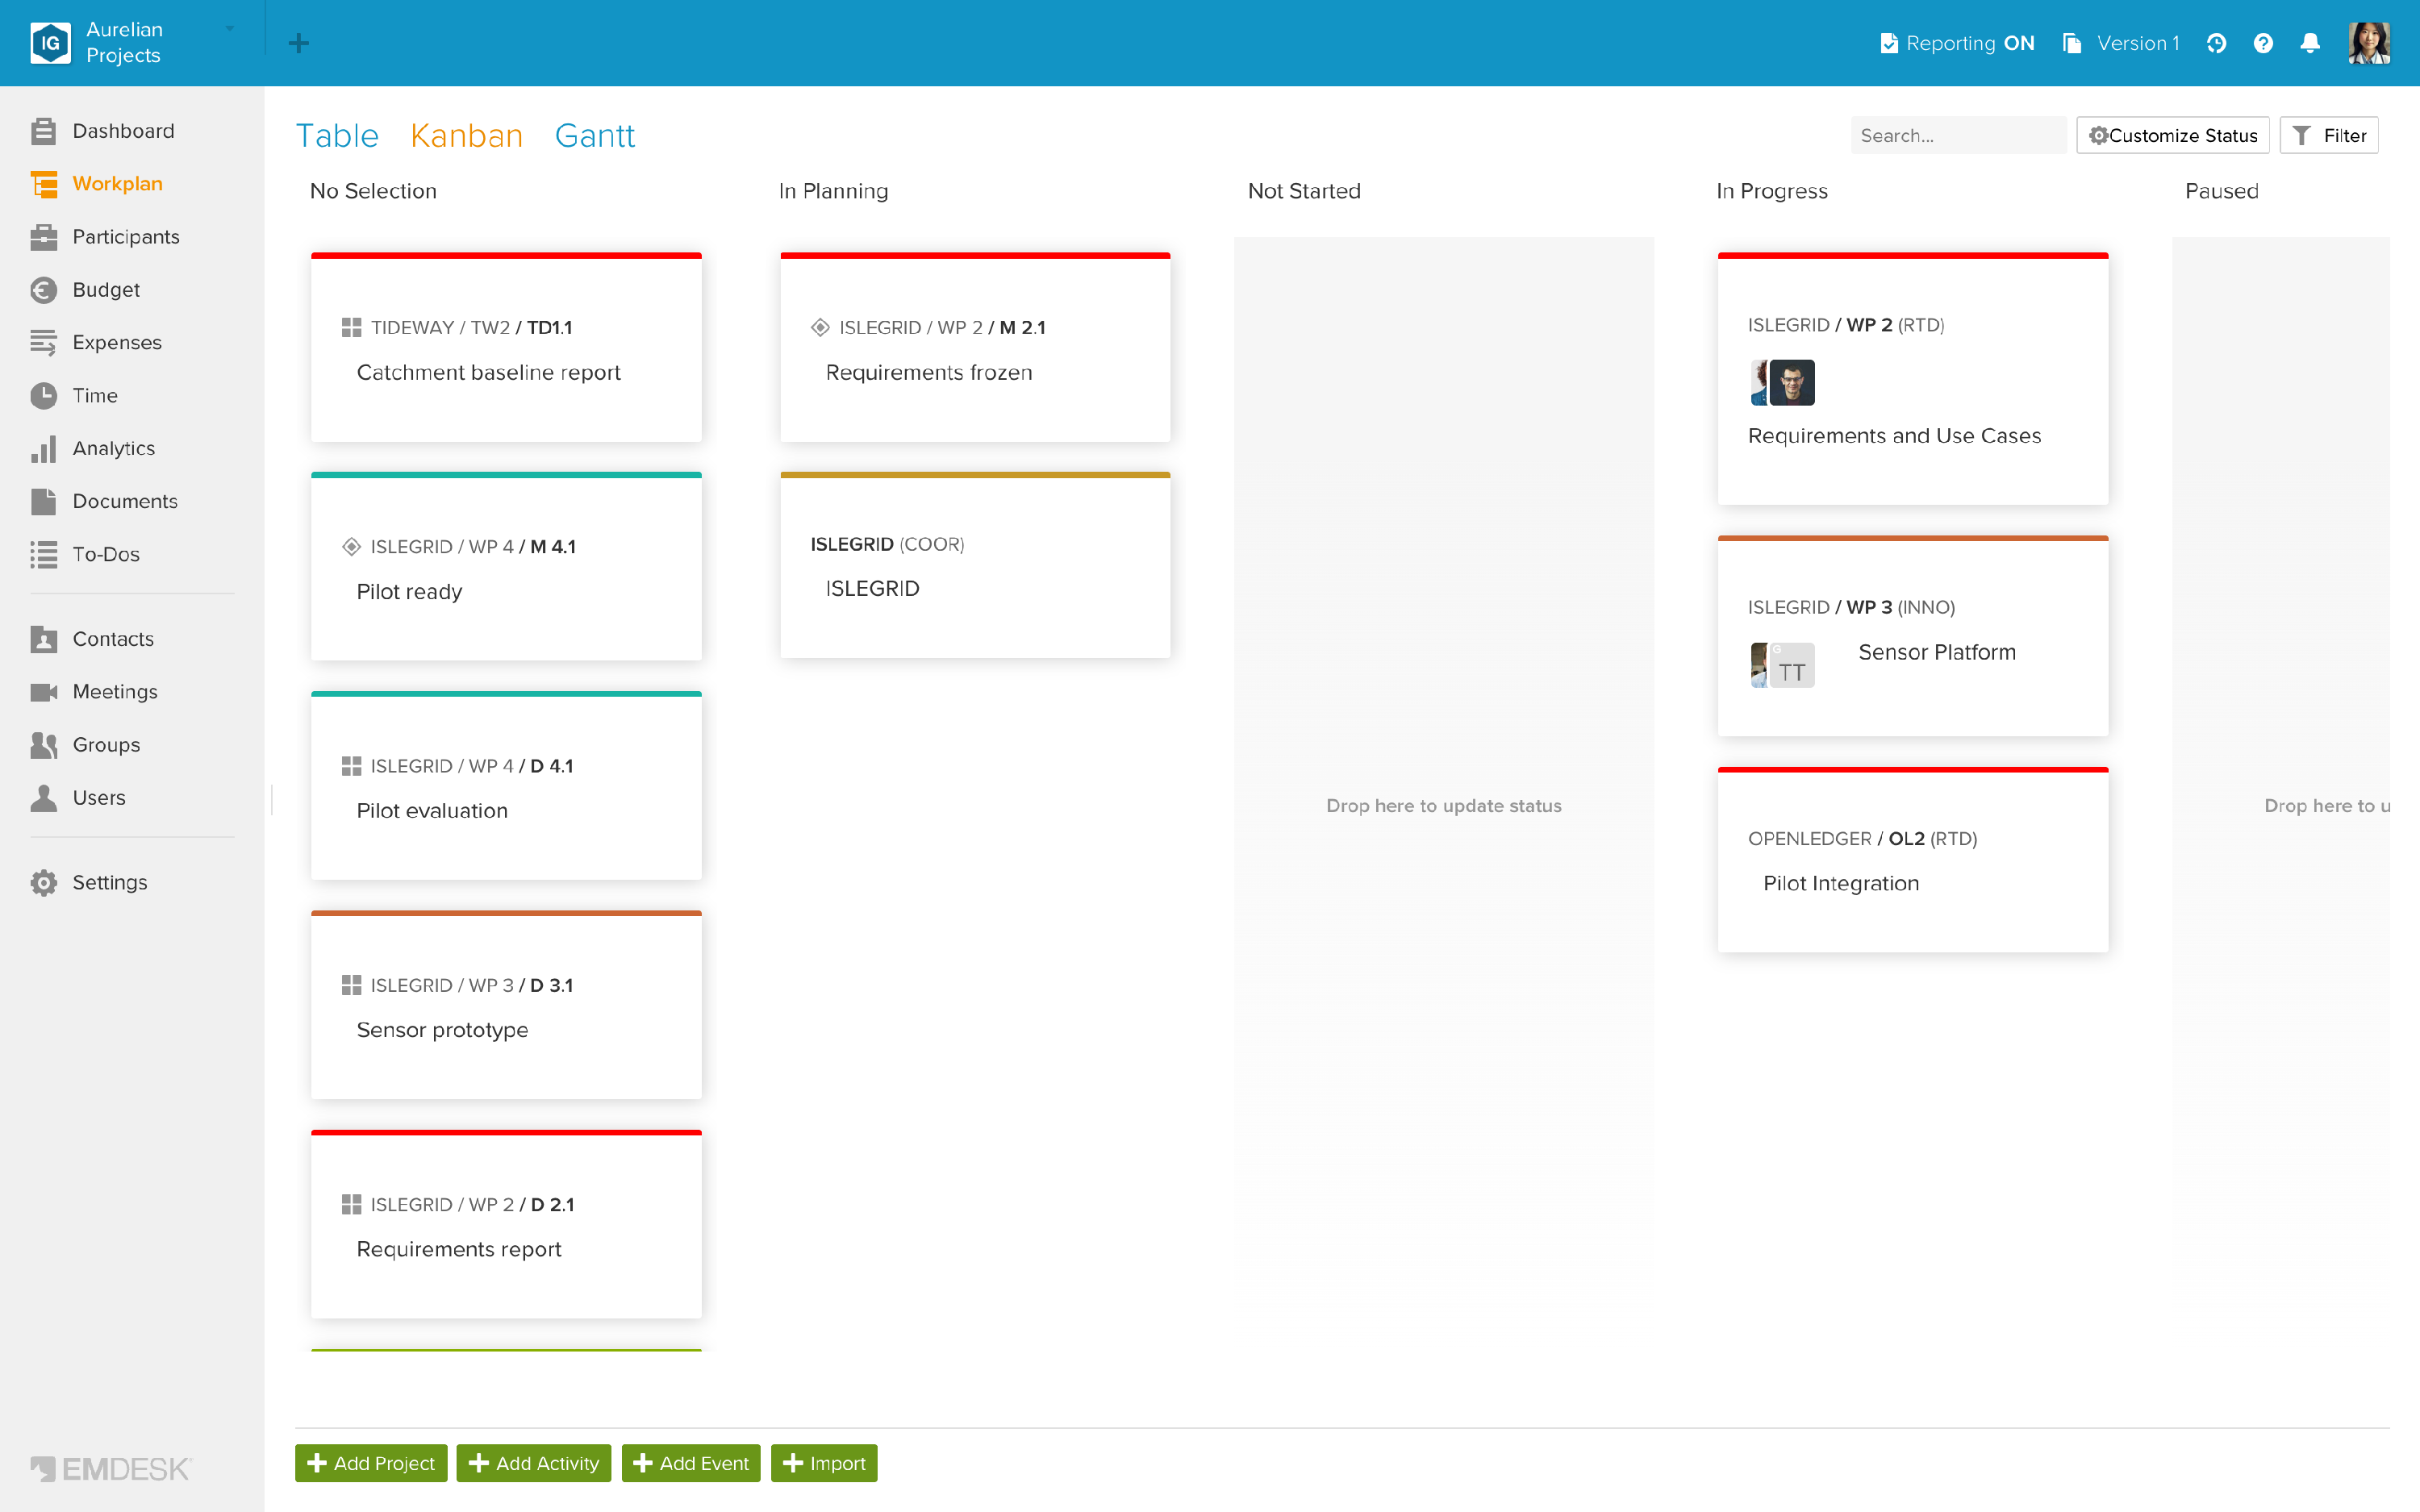
- Each column is a status, in the order of your status workflow. Click Customize Status to change the statuses.
- No Selection contains items that do not have a status yet.
- Drag a card to another column to change its status. This opens a status update with the new status preselected; nothing is saved until you click Save Update. Cards cannot be dropped back into No Selection.
- The coloured line at the top of a card shows the item's activity type (an event uses the type of its activity).
- Use Search and Filter to find cards quickly.
Read more in Working with Kanban.
Gantt view
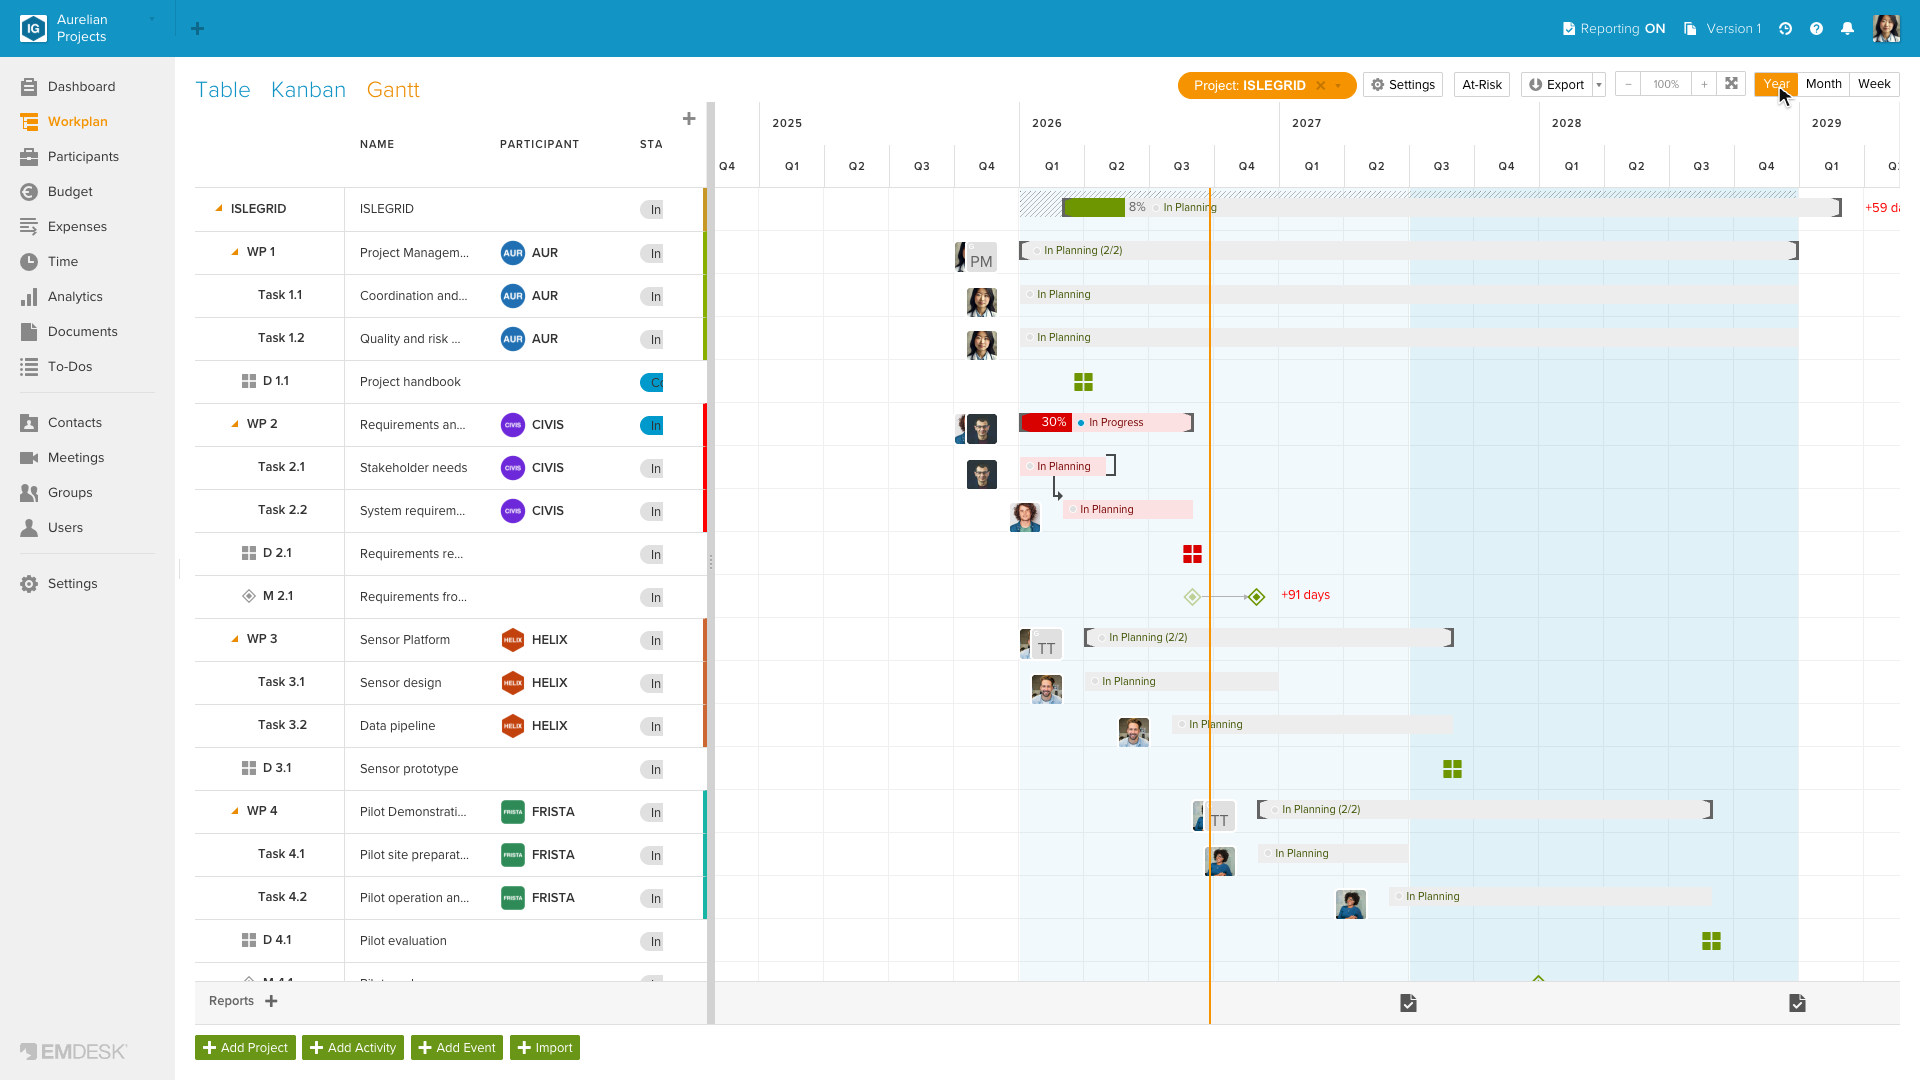
- Projects, activities and events are shown as bars and diamonds on a timeline, next to a list with configurable columns (Title, Participant, Activity Type, Status, Priority).
- Zoom with Ctrl/Cmd + scroll, a trackpad pinch or the −/+ control, or jump to Year, Month or Week.
- Lines between bars show dependencies (predecessors), so you can see how a delay affects other items.
- Turn on At-Risk to highlight overdue and soon-due items in red.
- Use Settings to choose what is shown on the bars, and Export to download the chart as PDF or Excel.
Read more in Working with the Gantt view.
Creating and opening items
This works the same in all three views.
Create new items with the buttons at the bottom of the Workplan:

- + Add Project: see Create a new project
- + Add Activity: see Create, update, and move activities
- + Add Event: see Create, update, and move events
- Import: see Import data into the Workplan
Act on an existing item with the … button at the end of its row (Table and Gantt view). The menu lets you edit the item, add a sub-activity or event under it, duplicate, lock or delete it, report a status update, track time, and add budget or expenses.
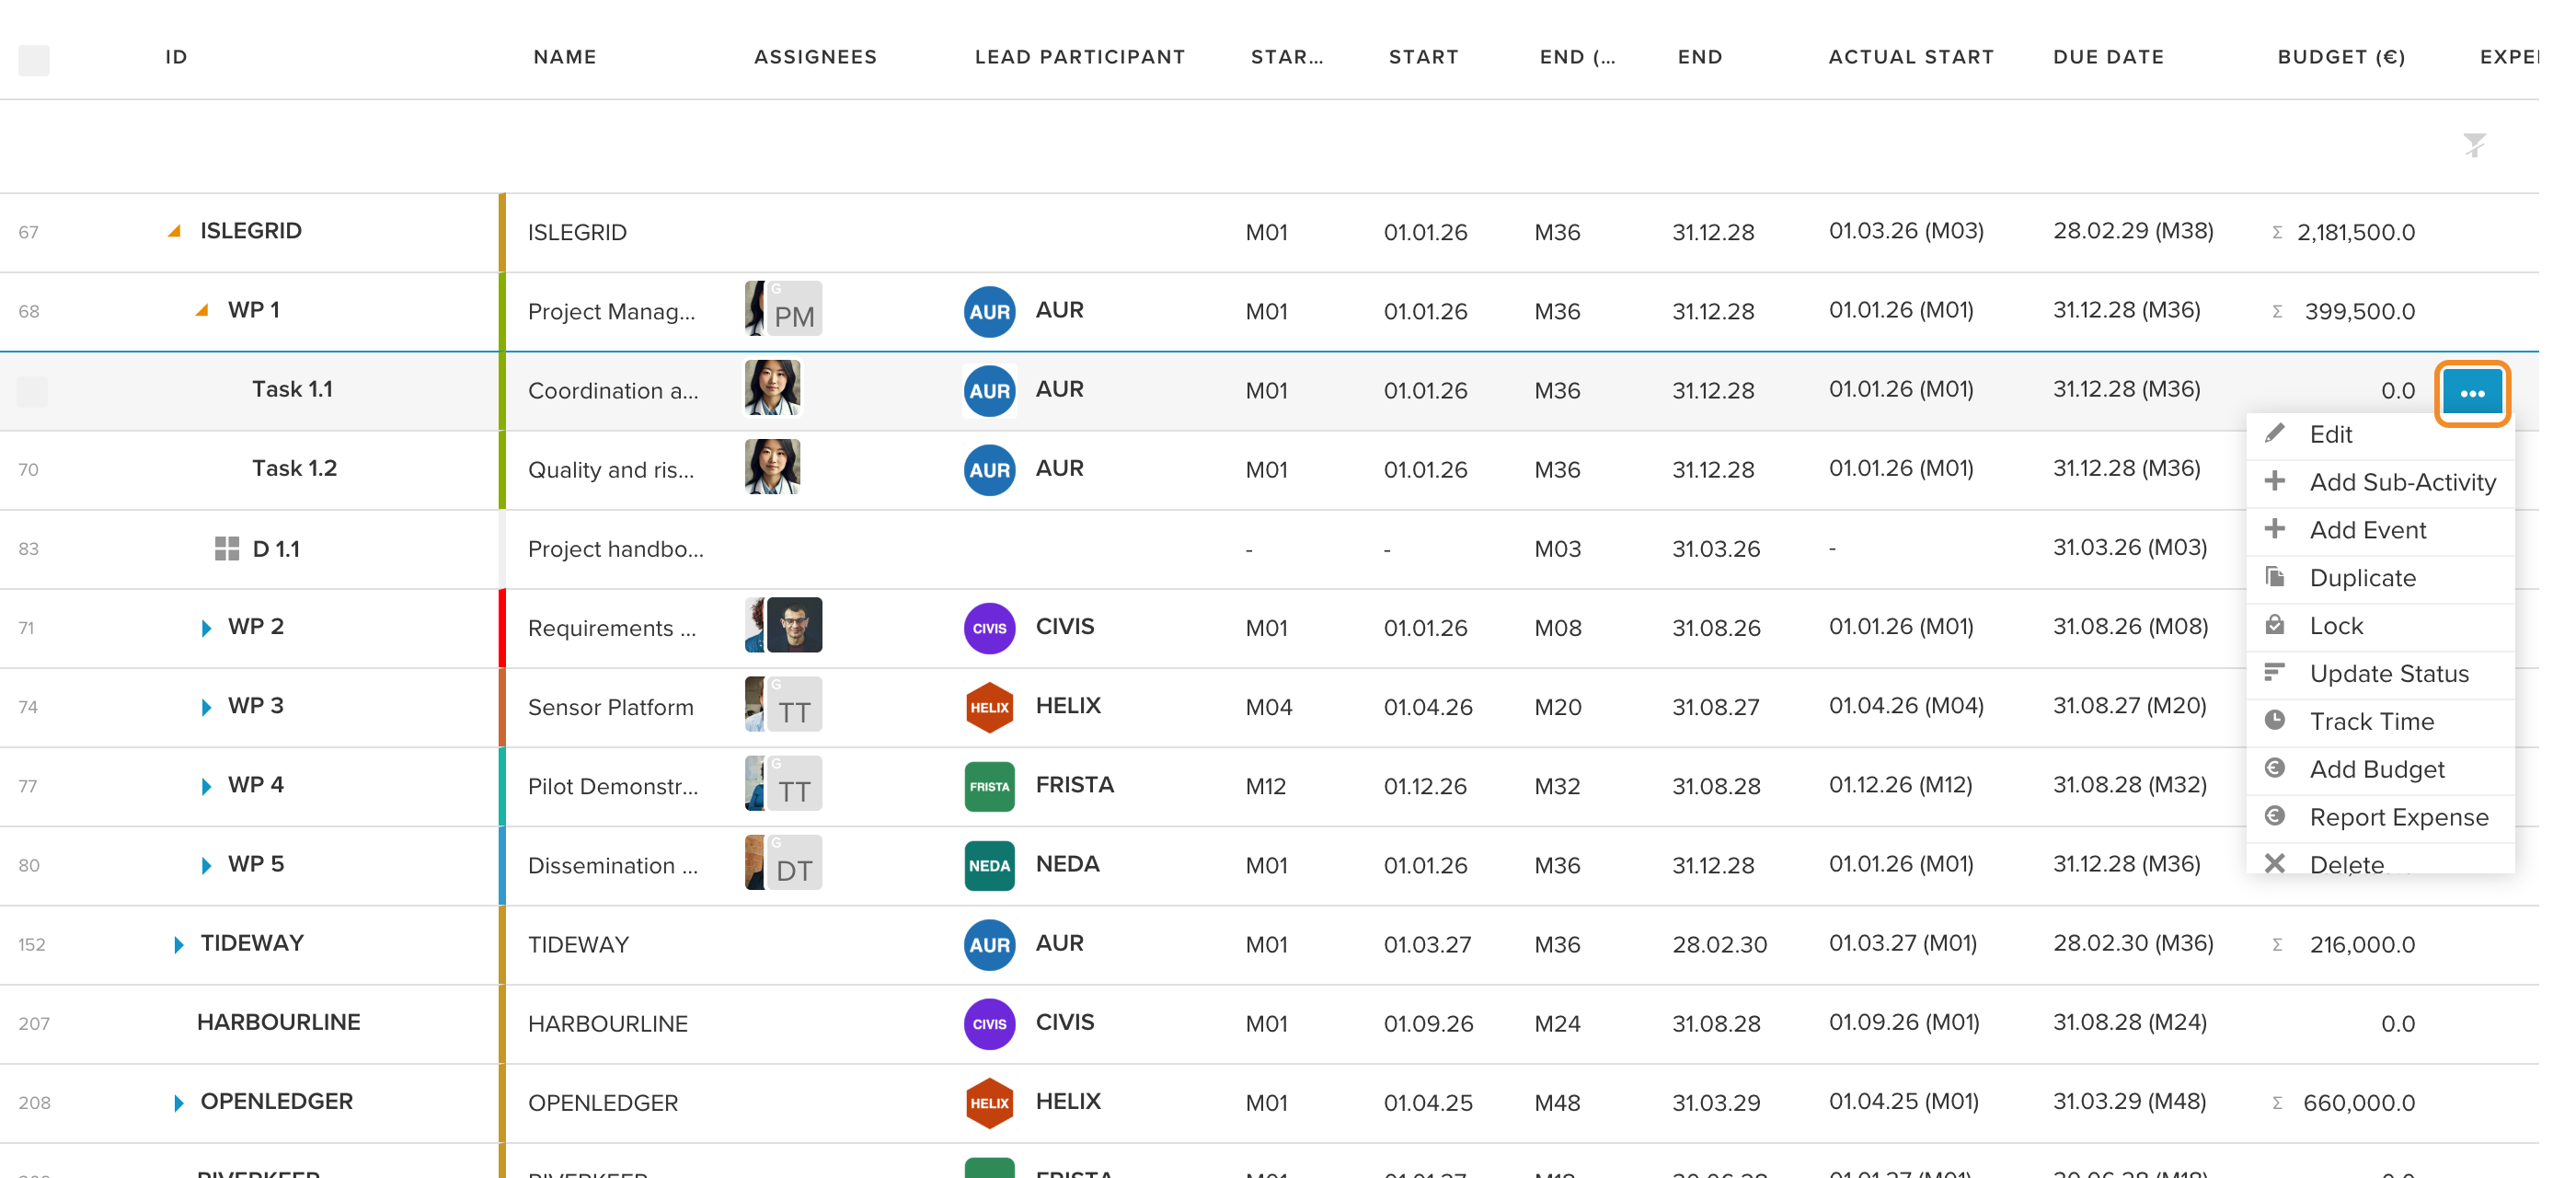
Open an item by clicking it. Its details open in the sidebar on the right, where you can edit it, report progress, and see its documents, comments and history.
💡 Next steps
- Create your first project and add activities
- Assign users to projects and activities
- Report progress as the work goes on