Managing Users
You can manage the project membership and access rights of users within each of your project workspaces. Please note that you cannot edit personal information or account data of users. Each user can update their own account details in their User Settings.
Note:
- User management must be done separately for each project workspace.
- To manage users, you must have the Admin or Manager role. Learn more in About roles and access rights.
Where to Manage Users
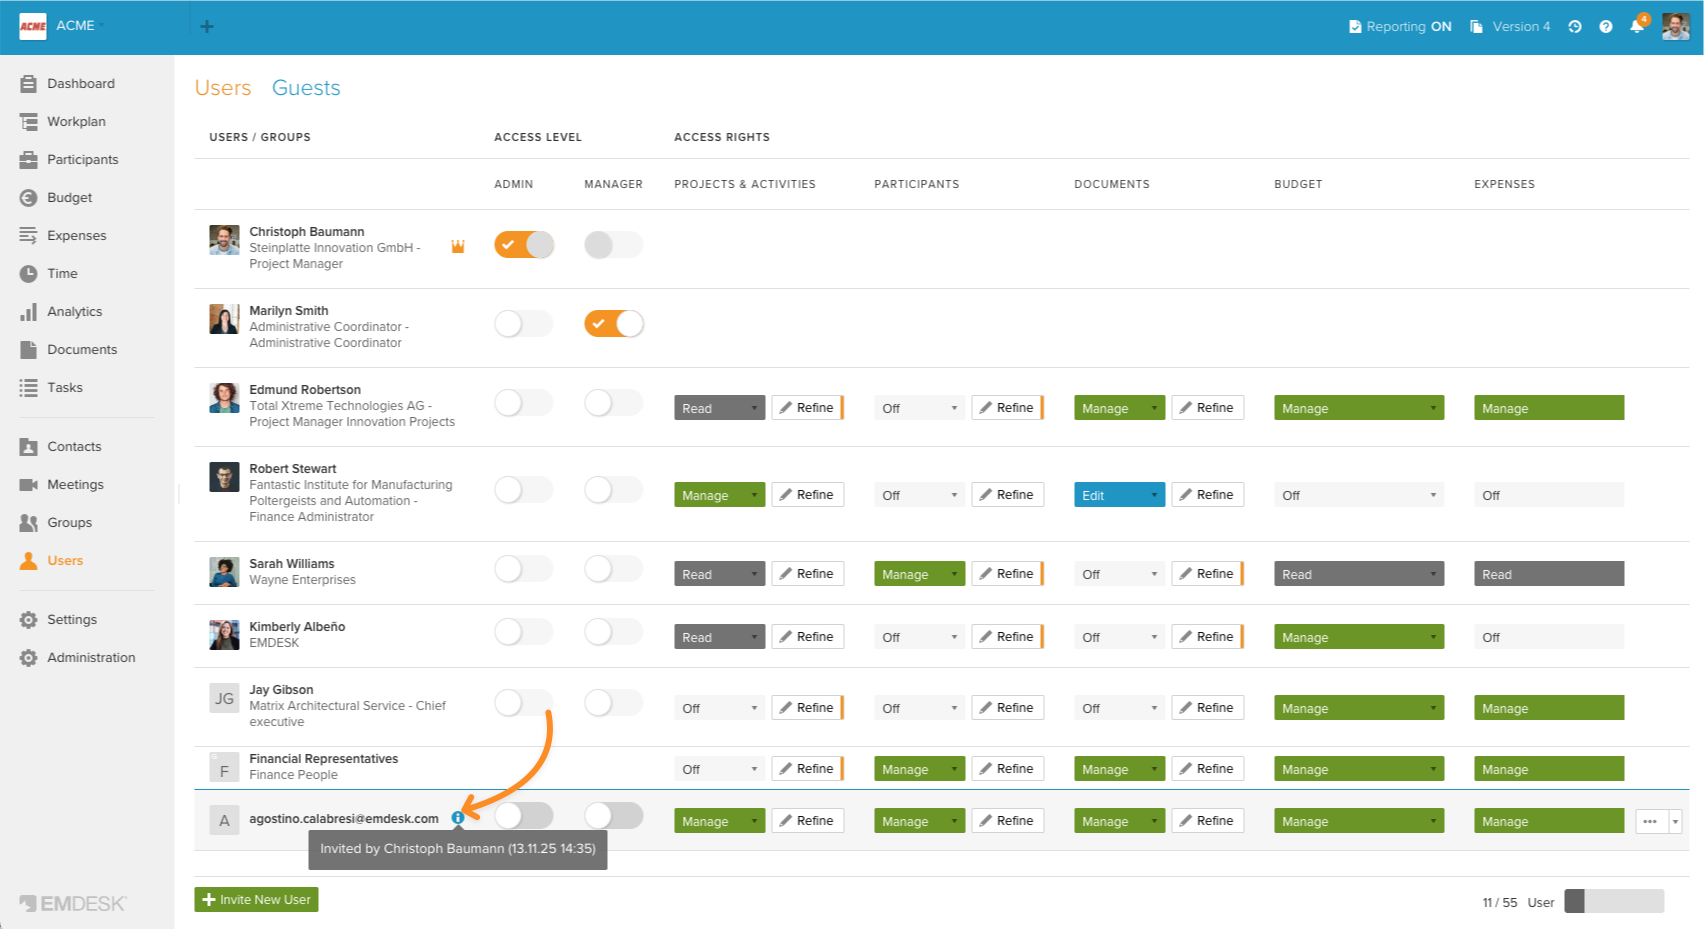
All project users are listed in the Users section of the Home menu. Here you’ll find a sortable and searchable table with:
- Active users
- Deactivated users
- Pending invitations
Use the search field at the top of the table to quickly filter users by name.

What You Can Do
Pending invitation
When you invite someone to join a project workspace, they appear in the Users list with an information icon indicating that the invitation is still pending.
Once the user accepts the invitation:
- The pending icon disappears
- Their contact details become visible
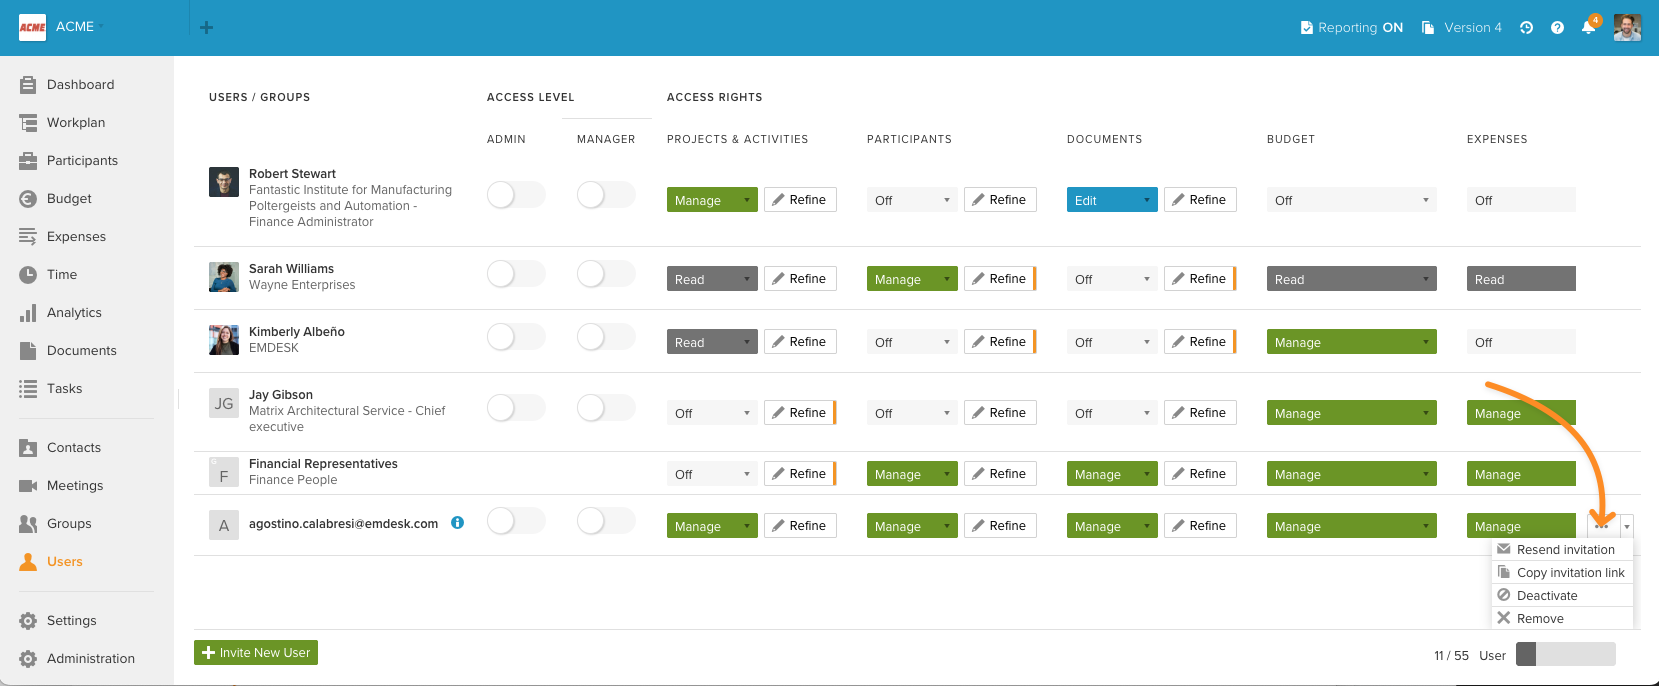
Resend invites
If the user has not yet accepted, you can resend the invite. Open the action menu next to the user with a pending invitation. Select Resend invitation.
Copy the Invitation Link
You can also manually share the invitation link if the user does not receive the invite email. Open the action menu next to the pending user. Select Copy invitation link, then send it via email or messaging app.
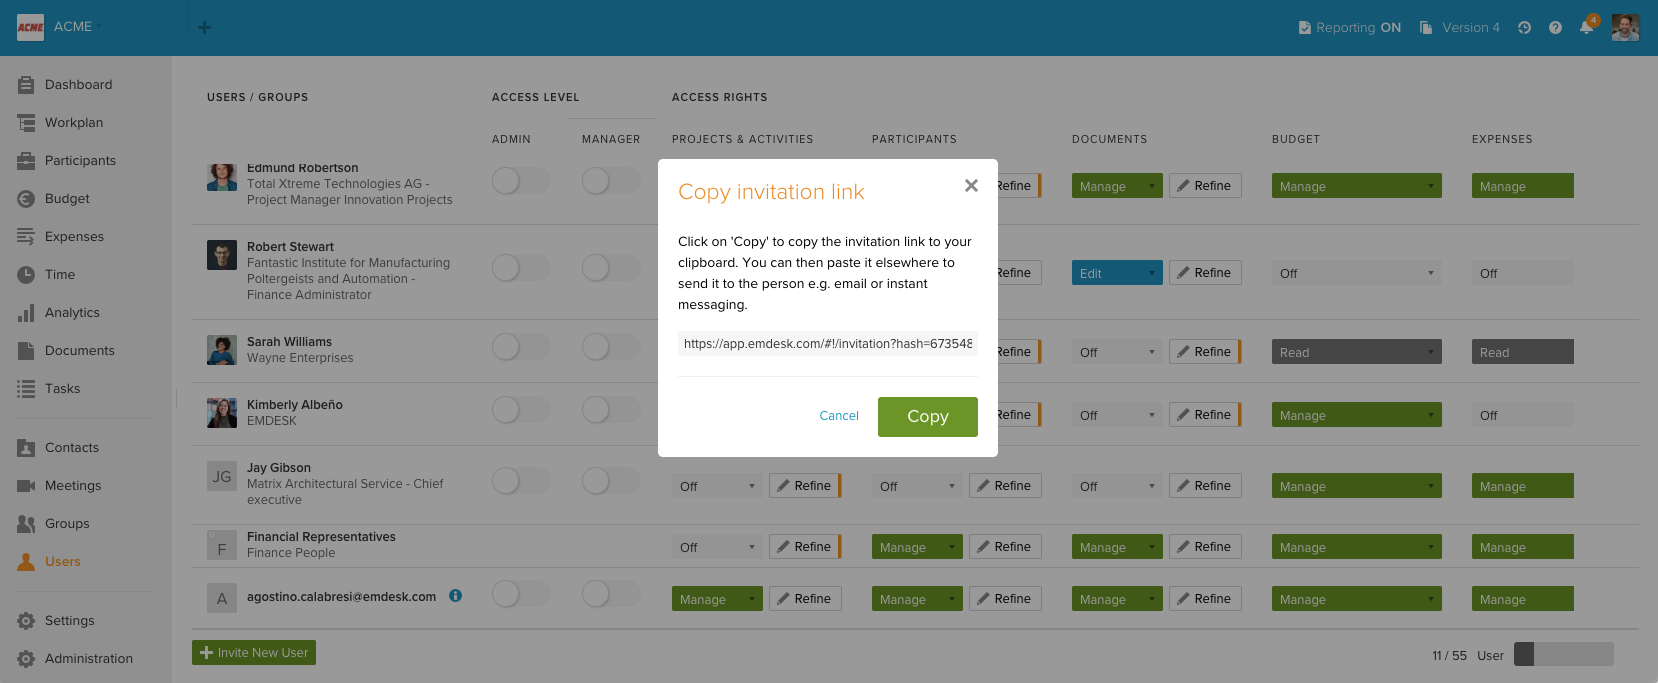
Tip: Invitation links in the email are valid for 7 days. If the link has expired or the email was lost, simply resend the invitation.
Deactivate or reactivate users
You can temporarily deactivate a user’s access while keeping their membership linked to the workspace.
Open the action menu next to the user you want to deactivate. Select Deactivate.
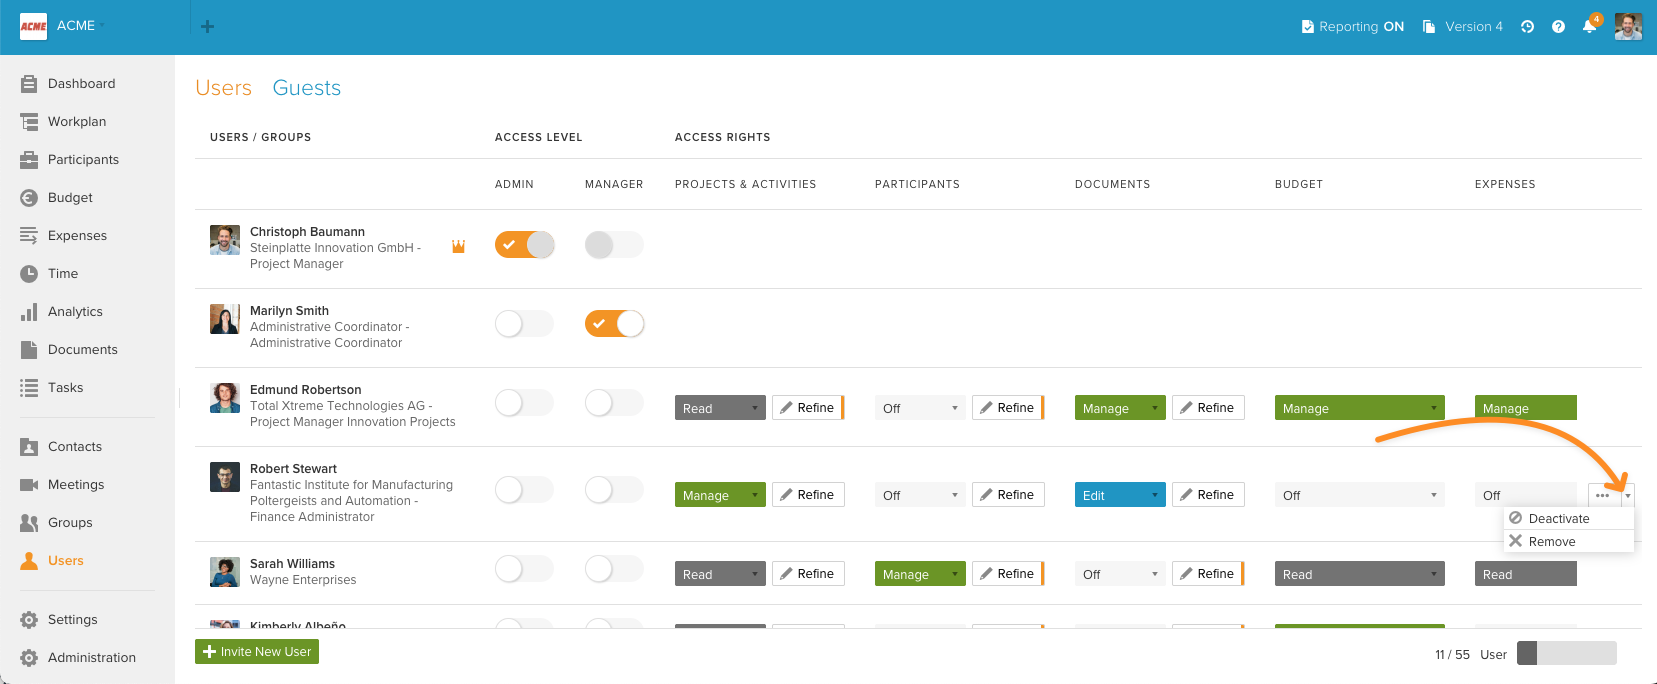
To reactivate a deactivated user, click the action menu at the user that you would like to reactivate and choose Activate from the dropdown list.
Note: Deactivated users will no longer have access to the project workspace, will not receive email notifications, and will not be able to send or receive emails through the group email addresses.