About menus navigation and getting around
Every time you log in at EMDESK via https://app.emdesk.com/ you are forwarded to the Dashboard of your last active workspace.
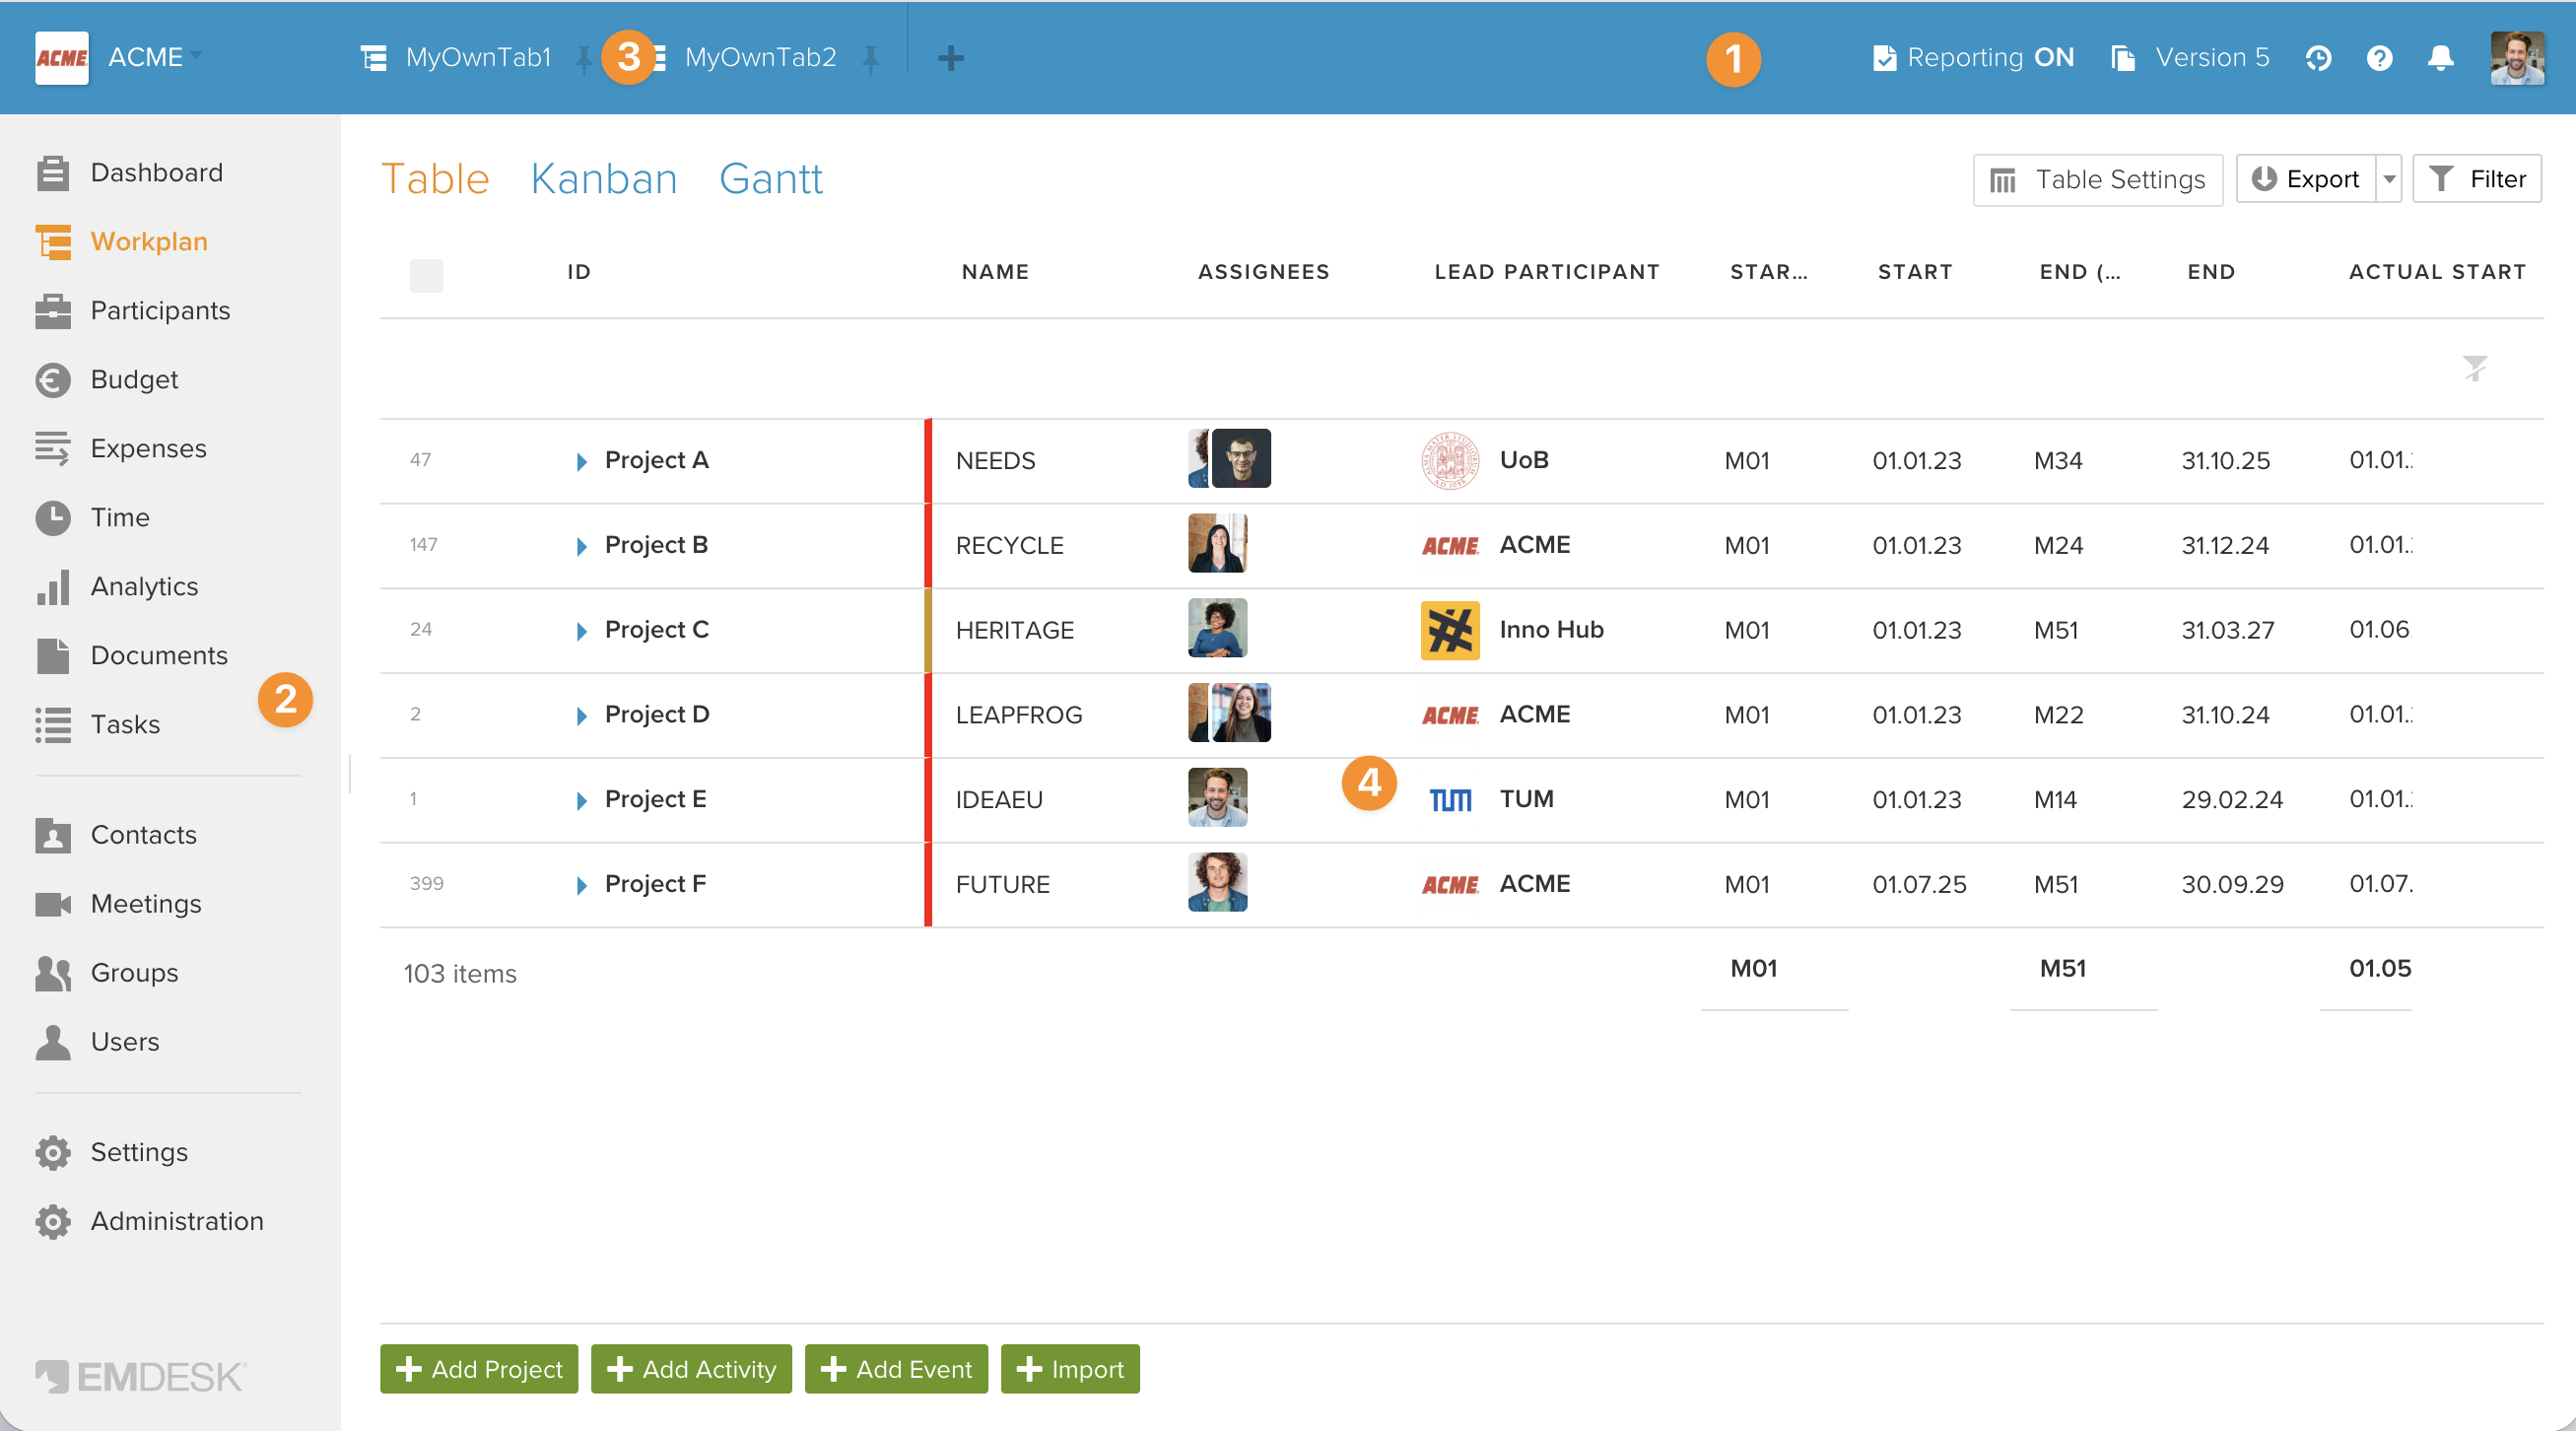
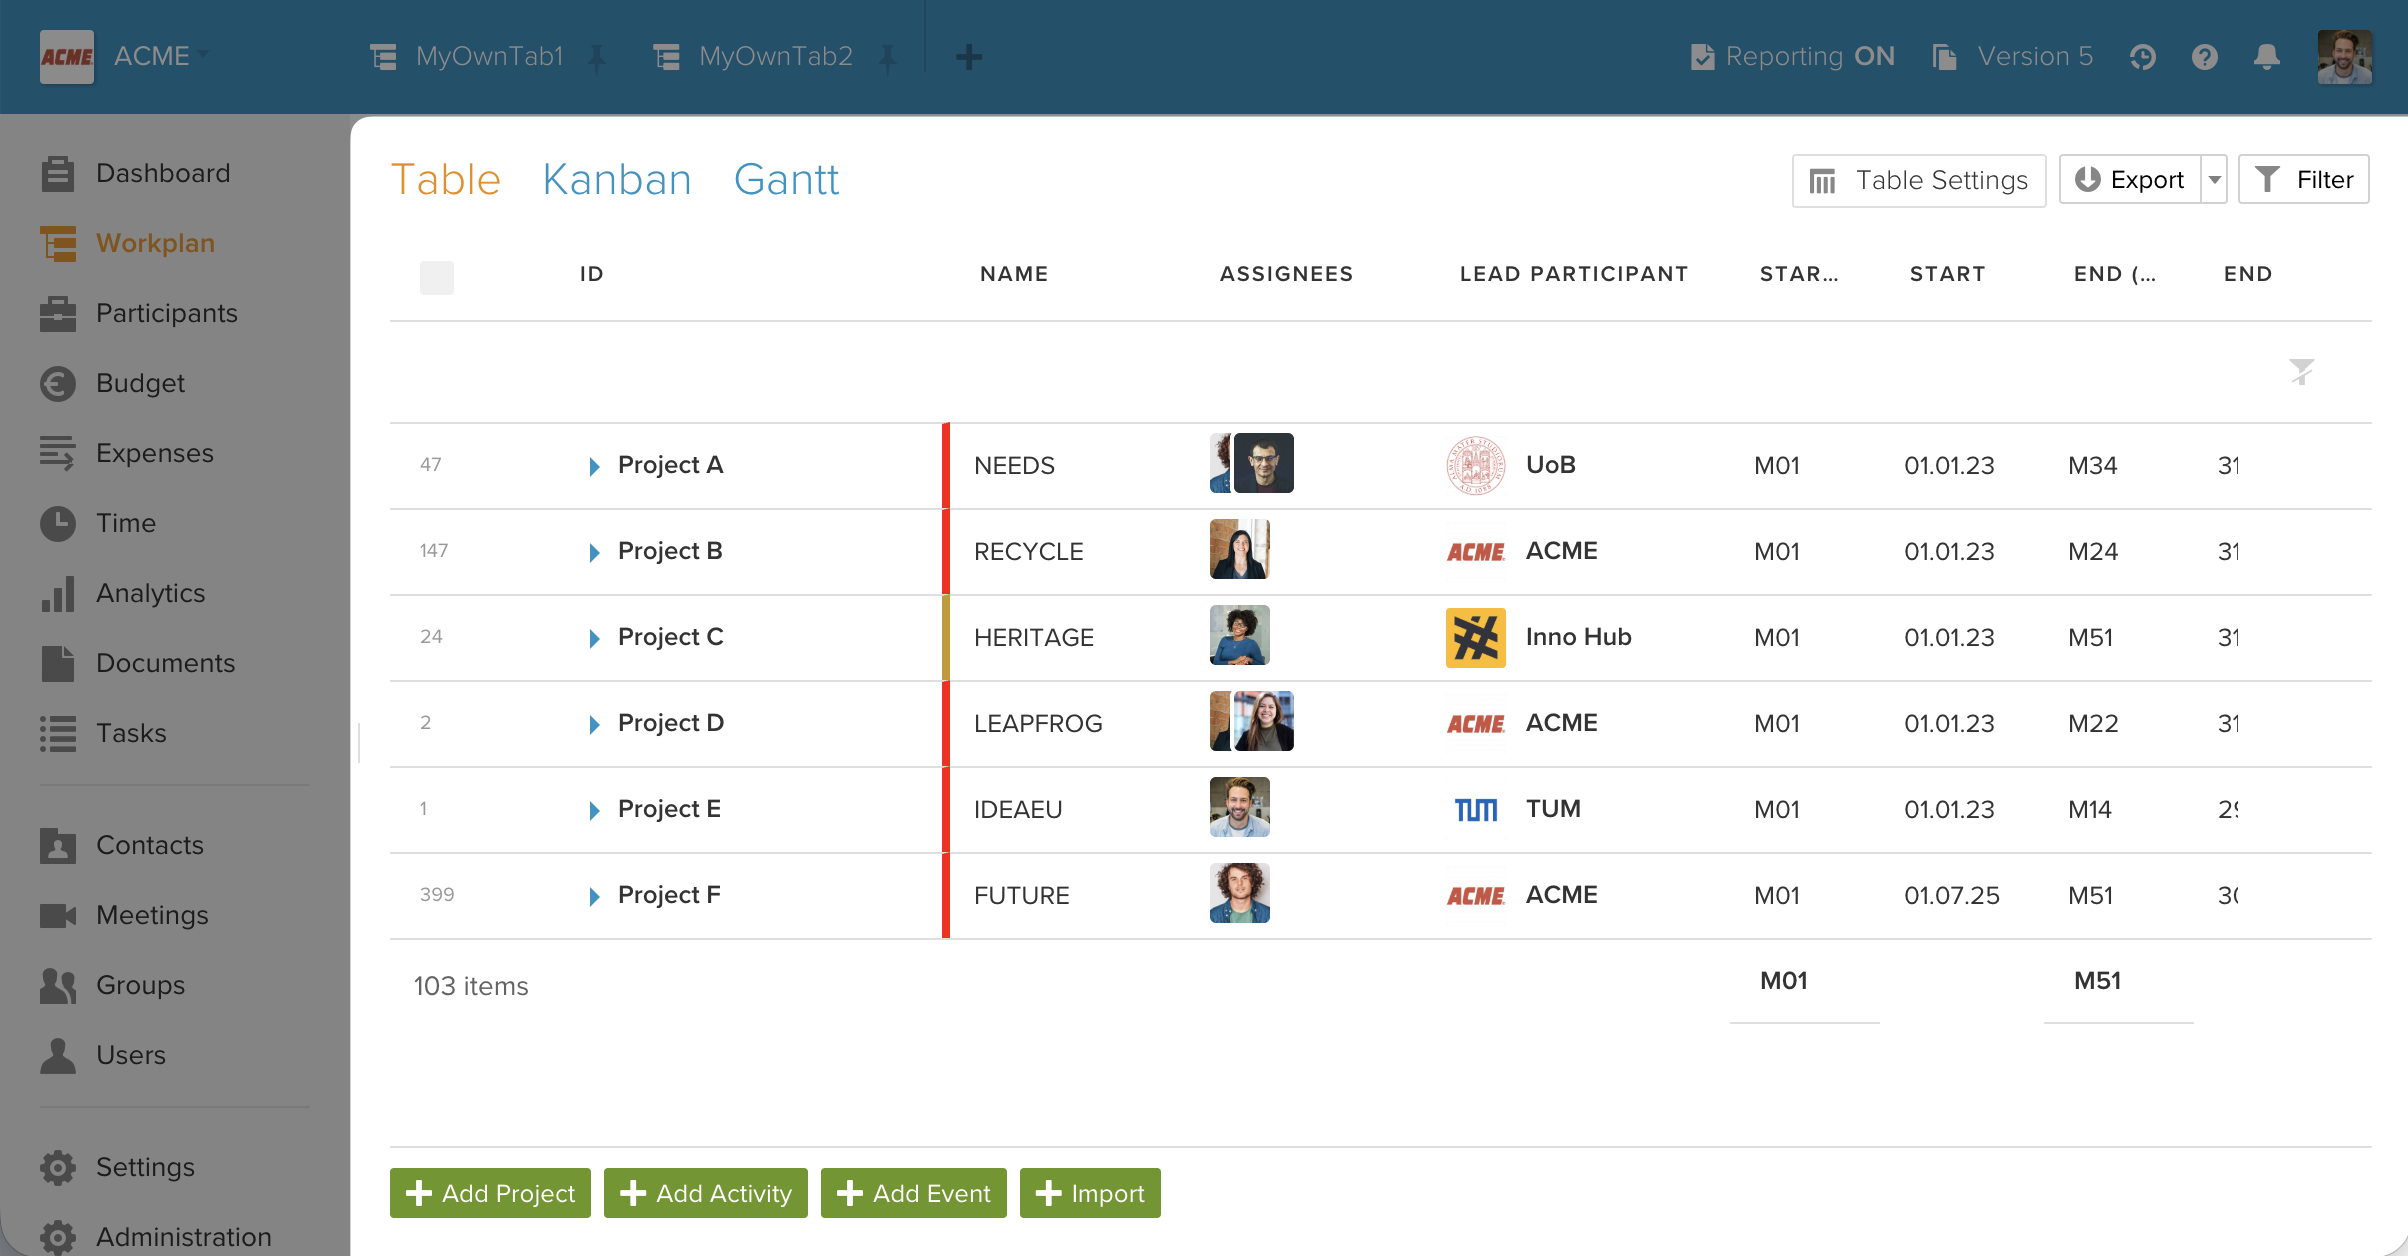
The application interface consists of five main areas:
- Header bar — Tabs, version selector, reporting mode, notifications, and user menu (1)
- Left sidebar menu — Workspace selection and main navigation (2)
- Pinned tabs — Save and switch between views with filters (3)
- Main workspace — Content area with data tables, charts, and tools (4)
- Sidebar — Detail panel for creating and editing items
Header bar
The header bar runs along the top of the screen.
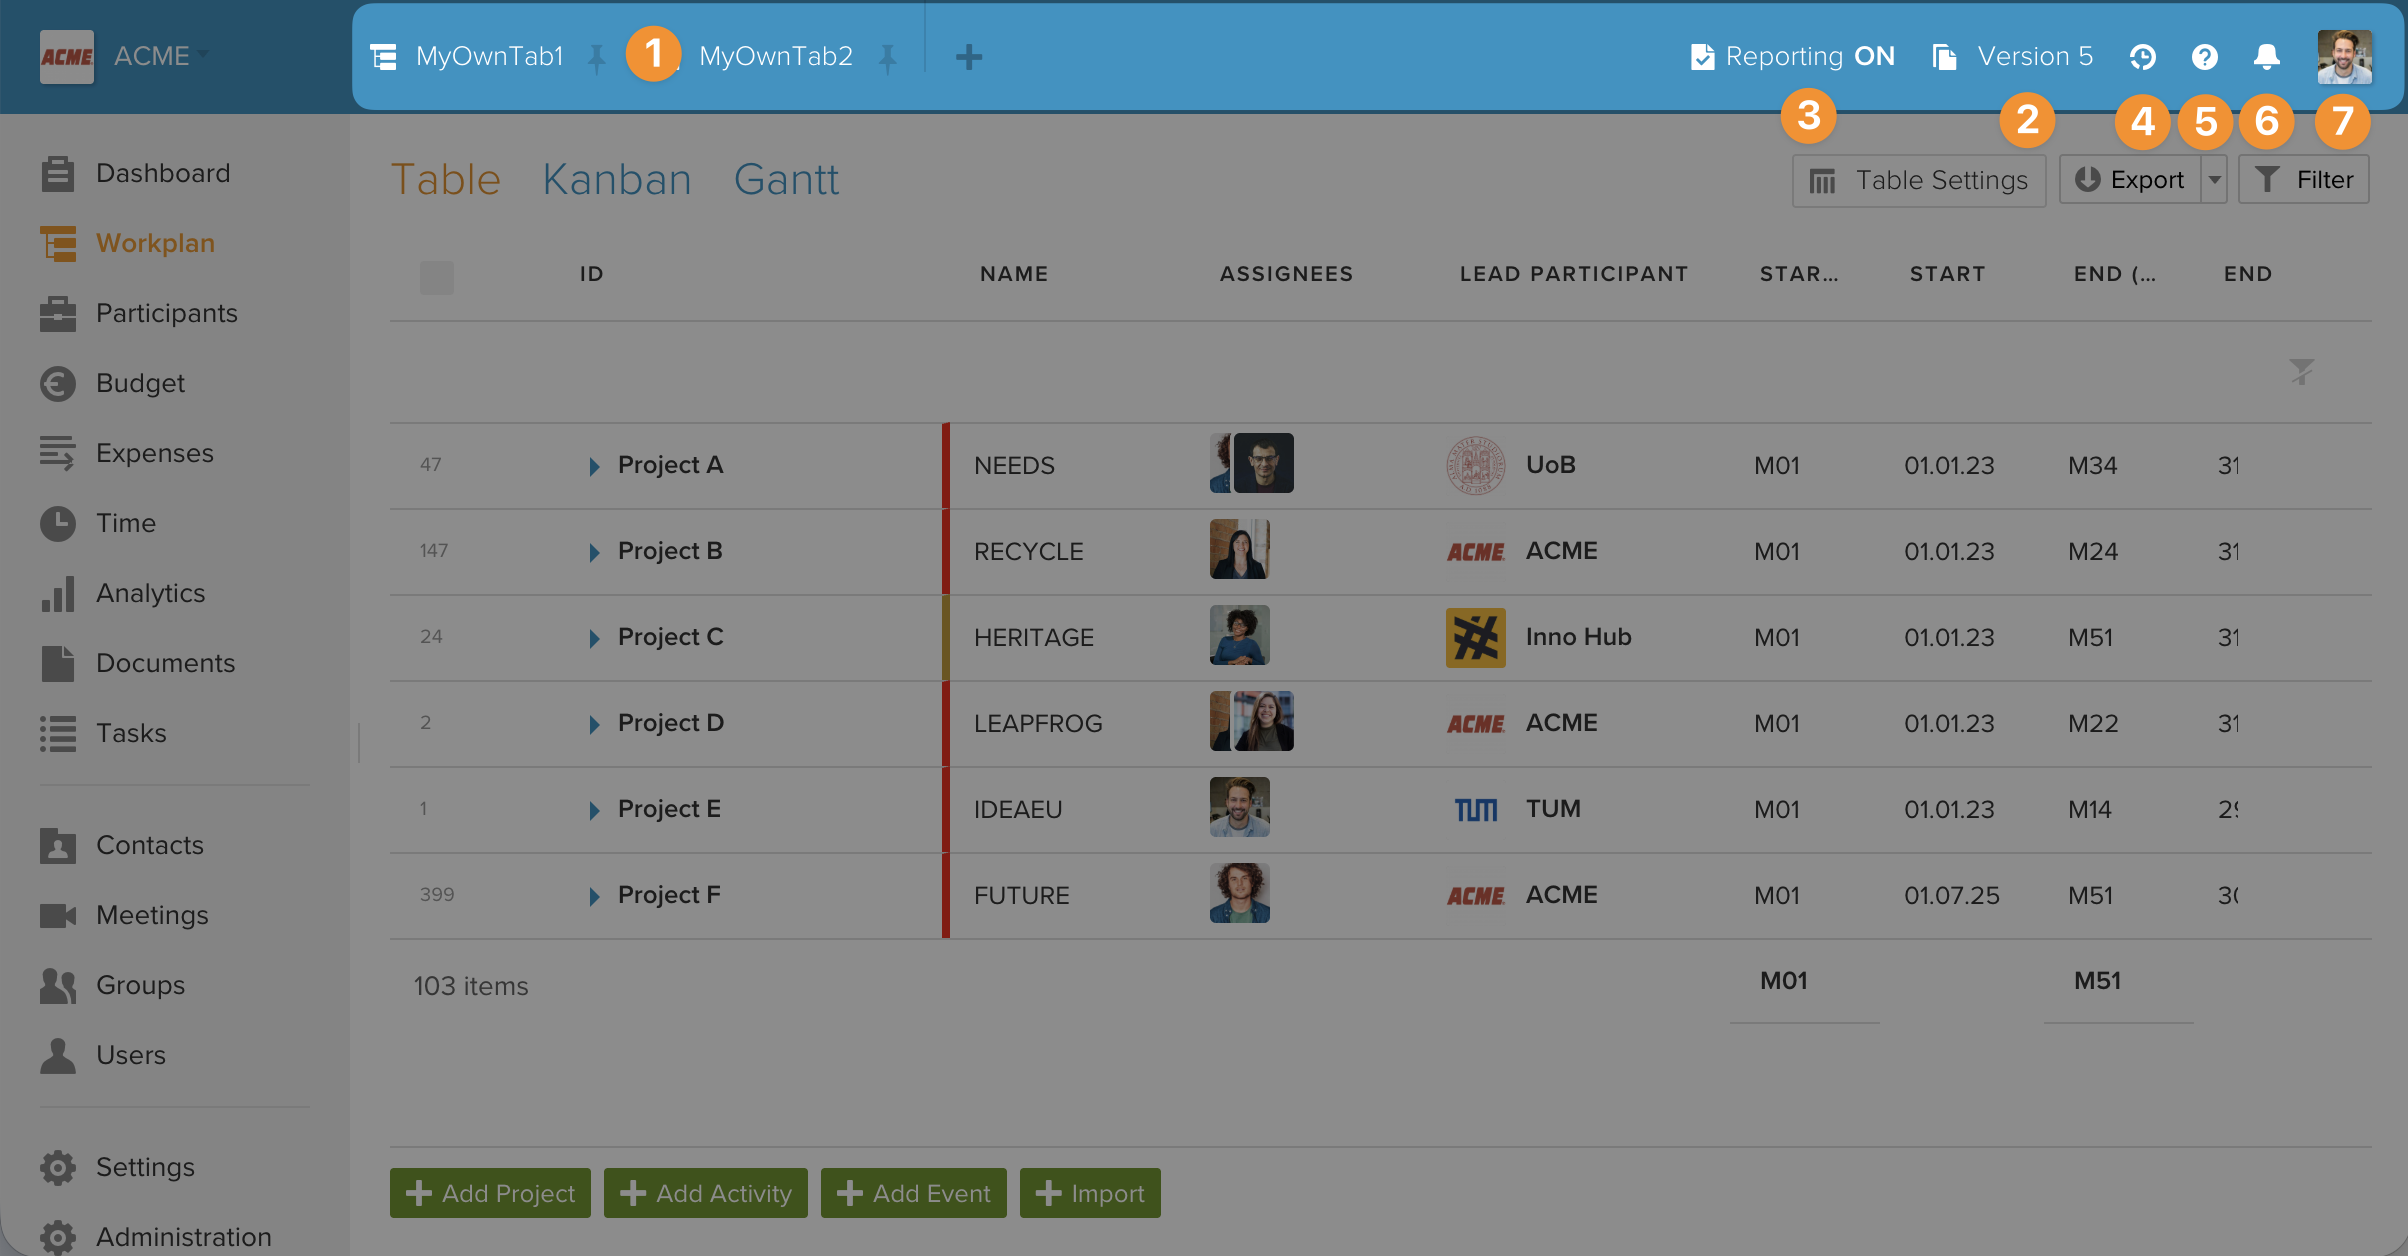
It contains several controls, arranged from left to right:
| Element | Description |
|---|---|
| Pinned tabs | Your saved tabs appear on the left side of the header. See Pinned tabs below. |
| Version selector | Shows the currently selected plan version (e.g., "V3 — Actual"). Click to switch between plan versions or navigate to the Version Manager. Versions marked "Draft" are newer than the actual version; versions marked "Idle" are older. |
| Reporting mode toggle | A switch to enable or disable reporting (implementation) mode for the workspace. When reporting mode is active, partners can submit expenses and status updates. Only workspace managers and admins can toggle this. The extended reporting controls include date pickers to disable resource reporting and status reporting after specific dates. Hover over it to see who last changed the setting and when. |
| Activity Stream | Click the stream icon to open the full Activity Stream view, which shows all recent changes across the workspace. |
| Help | Opens the integrated help system with context-relevant help articles for the page you are currently viewing. |
| Notifications | The bell icon shows a count of new notifications. Click to open a dropdown with the 5 most recent notifications. Each notification shows what changed, when, and links to the relevant item. Use "Mark all as seen" to clear, or "Show All" to go to the full Notifications page. |
| Profile picture | Click your profile picture to open the user menu. |
User menu
Click your profile picture in the top-right corner to open the user menu.
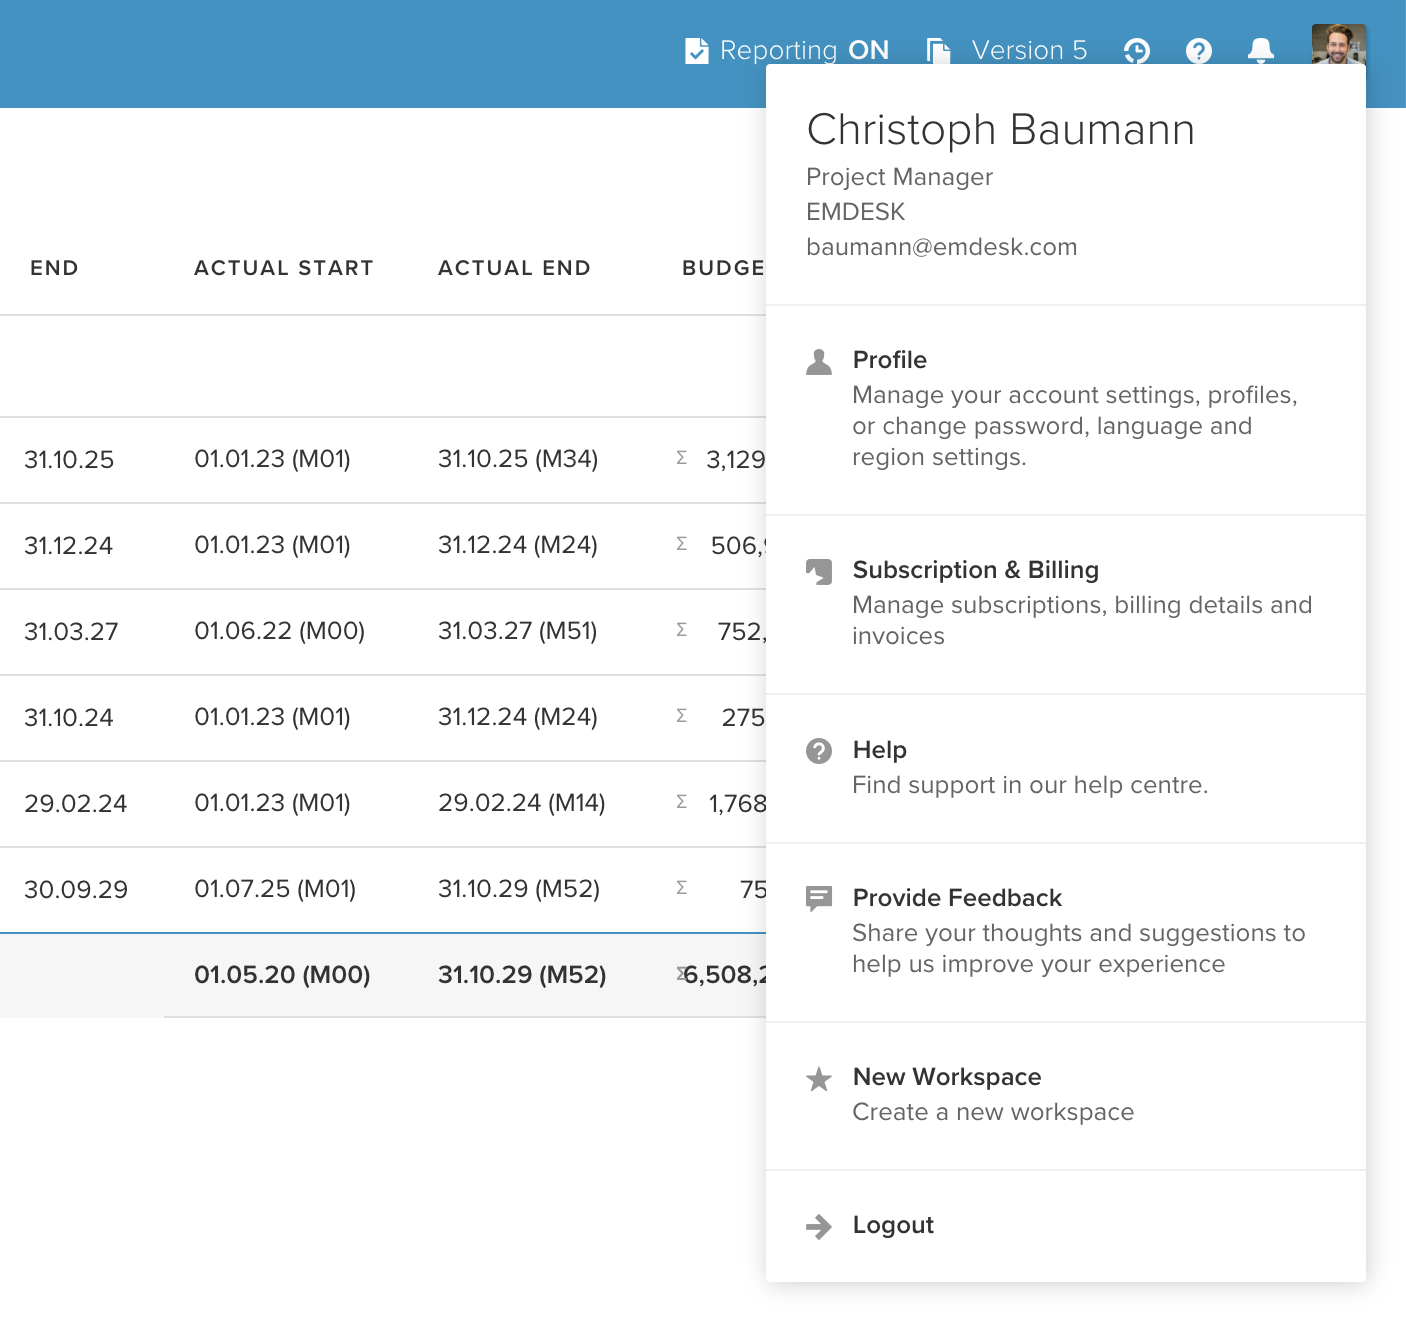
It shows your name, position, company, and email at the top, followed by these options:
| Menu item | Description |
|---|---|
| Profile | Manage your account settings — name, email, password, profile picture, and preferences |
| Subscription and Billing | View and manage your subscription plan, billing details, and invoices |
| Help | Opens the EMDESK Help Center in a new tab |
| Provide Feedback | Share your thoughts and suggestions to help improve EMDESK |
| New Workspace | Launch the workspace setup wizard to create a new workspace |
| Logout | End your session and return to the login page |
Left sidebar menu
The left sidebar is your main navigation. It consists of two parts: the workspace selector at the top and the navigation menu below.
Workspace selector
At the top of the sidebar, the workspace selector shows the short name of your current workspace. Click it to switch to a different workspace. All workspaces you are a member of are listed.
Navigation menu
The main menu lists all available sections of your workspace.
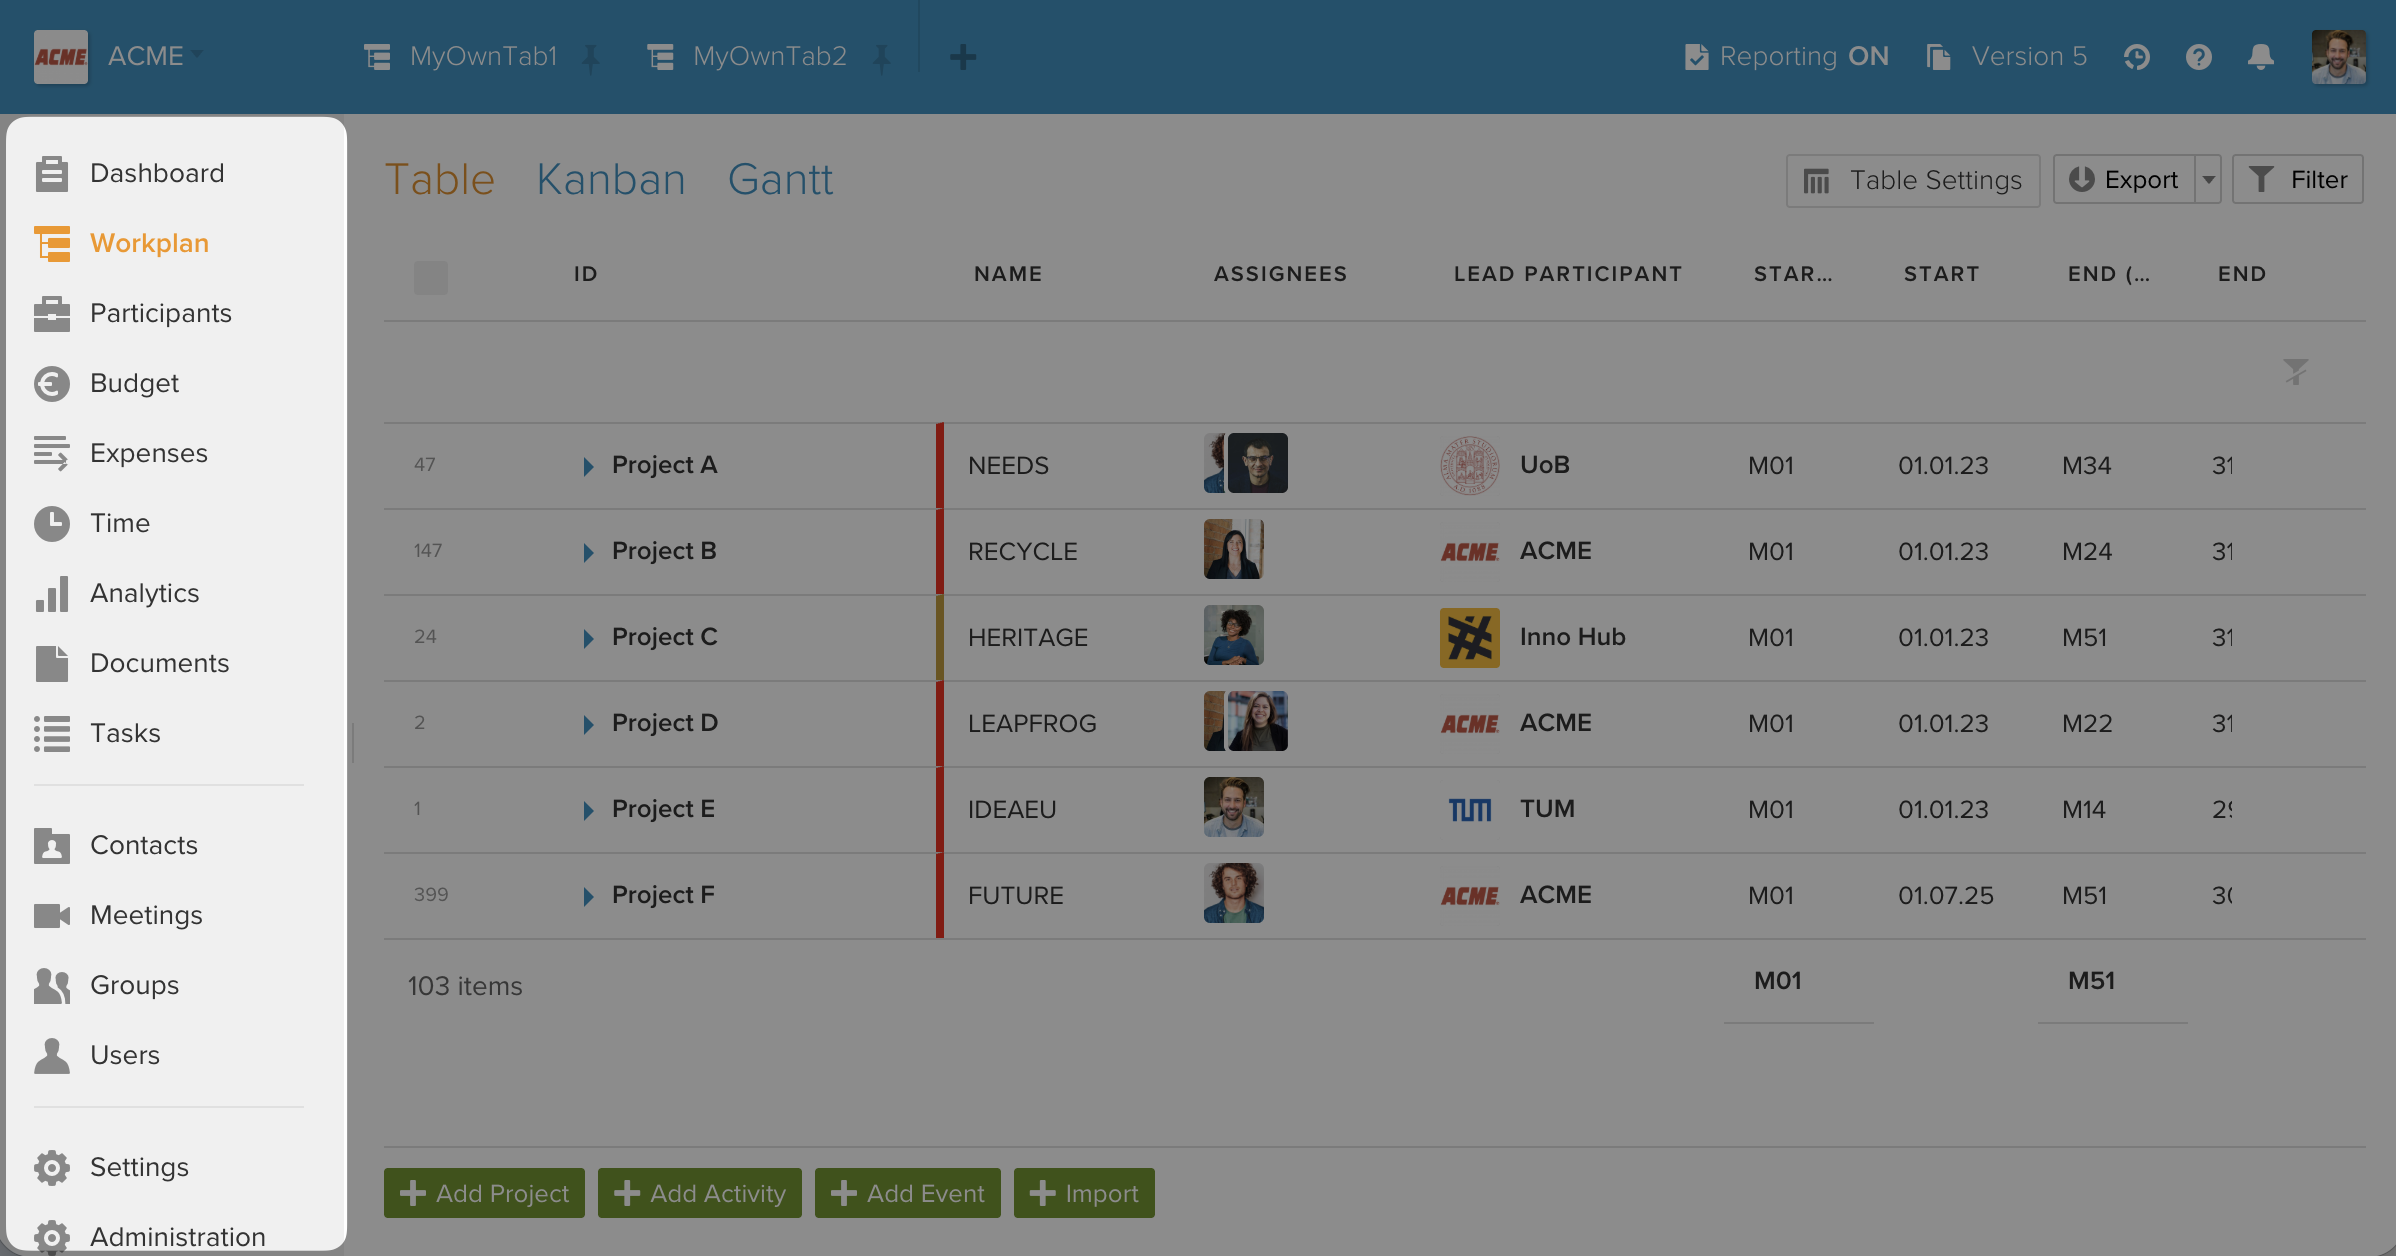
The items shown depend on your access rights — you only see sections you have permission to access. Typical menu sections include:
| Section | Description |
|---|---|
| Dashboard | Projects overview with charts, starred items, and activity feed |
| Workplan | Projects, activities like work packages and milestones, and deliverables (sub-menu with Table, Kanban and Gantt chart) |
| Participants | Participants and partner organisation information |
| Budget | Planned budget by project, activity, partner, and cost category |
| Expenses | Expenses and reported spending by project, activity, partner, and cost category |
| Time | Time tracking and effort reporting |
| Analytics | Cross-tabulation tables for budget and effort analysis |
| Documents | File management with sub-menu: All, Attached, Recent, Public Links, Favorites, Trash |
| Tasks | Task management with All, Completed, and Trash views |
| Contacts | Individual contacts and contact management |
| Meetings | Meeting management and scheduling |
| Groups | Group management and organisation |
| Users | Access permissions for users, groups and guests |
| Settings | Workspace-level configuration including versions management and customization |
Some menu items lead to sub-menus with further options. When inside a sub-menu, click the back arrow at the top to return to the main menu.
The currently active section is highlighted in the menu. When you navigate to a page, the menu automatically opens to the correct level.
Compact mode
Click the collapse button at the bottom of the menu to switch to compact mode, which shows only icons without labels.

This gives you more space for the main workspace. The sidebar also collapses automatically when the browser window is narrower than 1200 pixels. Click the collapse button again to expand the menu back to full width. In compact mode, hover over an icon to see its label as a tooltip.
Pinned tabs
The tab bar appears at the top of the screen (in the header area) and lets you save different views of your workspace for quick access. Tabs remember the page you were on, any filters you had applied, and your table settings.

How tabs work
- To create your first pinned tab, click the + icon at the top in the tab bar.
- First customize your view with filters, columns, sorting and other settings, then click the pin icon on the tab to save it. Pinned tabs stay in the tab bar and preserve their state (page, filters, table settings) when you switch away.
- Click a pinned tab to return to that exact view.
- Double-click a pinned tab to rename it with a custom label.
- You can have up to 8 pinned tabs on paid plans. The Free plan is limited to 2 pinned tabs.
- Click the × button on a tab to close it. Closing a pinned tab will ask for confirmation since its saved state will be lost.
Pinned tabs are saved to your account and persist across sessions and devices.
Main workspace
The main workspace is the large area to the right of the sidebar menu.
It displays the content of whichever section you have navigated to — data tables, charts, forms, settings pages, or document views.
Many sections display project data in different formats:
- Data tables — Sortable, filterable tables (e.g., Workplan table, Budget, Expenses, Participants). You can customise which columns are visible, reorder them, and adjust column widths.
- Gantt chart — Visual timeline of activities with dependency arrows and deliverable markers
- Kanban board — Activities organised by status columns
- Charts and dashboards — Budget/expense comparisons, personnel expenditure graphs, analytics cross-tables
At the top of most pages, you will find a page header with the section title and action buttons (e.g., filters, view options, export). At the bottom or top right of list views, you typically find an "Add" and "Import" button to create new entries.
Export options: Data tables can be exported to Excel (.xlsx) or CSV format only. EMDocs (the built-in document editor) are exported as .docx files.
Sidebar
The sidebar appears on the right side of the screen when you click on any element such as a project, activity, participant, budget, expense, or document. It is the primary place where you create, view, and edit items.
The sidebar typically contains multiple tabs depending on the type of item:
- Edit — View and modify the item's properties and details
- Discussion — Comments and conversations about this item
- Documents — Files attached to this item
- Tasks — Task management related to this item
- Activity Stream — Change log for this specific item
- Access — Permission settings for this item
Click X in the sidebar or press Escape to close it. You can also click a different item to switch the sidebar to that item's details.